Login-Web Interface
Login-Web is a “one stop shop” for access to our High Performance Computing resources. With Login-Web, it is possible to upload and download files, create, edit, submit, run GUI applications, and connect to nodes via SSH, all via a web browser, with no client software to install and configure.
System Requirements
Currently, the site is confirmed to work with newer versions of Chrome (22+), Firefox (16+), and Microsoft Edge (11+). We are still working to expand availability to additional clients, and are planning on including compatibility for mobile devices (phones and tablets) in the future.
Note
When logging in for the first time to Login-Web, you will be required to set up MFA, please see the MFA documentation for more information: https://docs.hpc.cam.ac.uk/hpc/user-guide/mfa.html
If you need to reconfigure your MFA please contact support@hpc.cam.ac.uk and request a token reset.
Connecting
To connect to Login-Web, visit https://login-web.hpc.cam.ac.uk. The first page of the Login-Web site redirects you to the login page.
Tip
For a video guide on how to use Login-Web for CSD3, please visit https://www.hpc.cam.ac.uk/getting-started-csd3-tutorials
Logging in
Login with your CSD3 HPC credentials: CRSid and password.
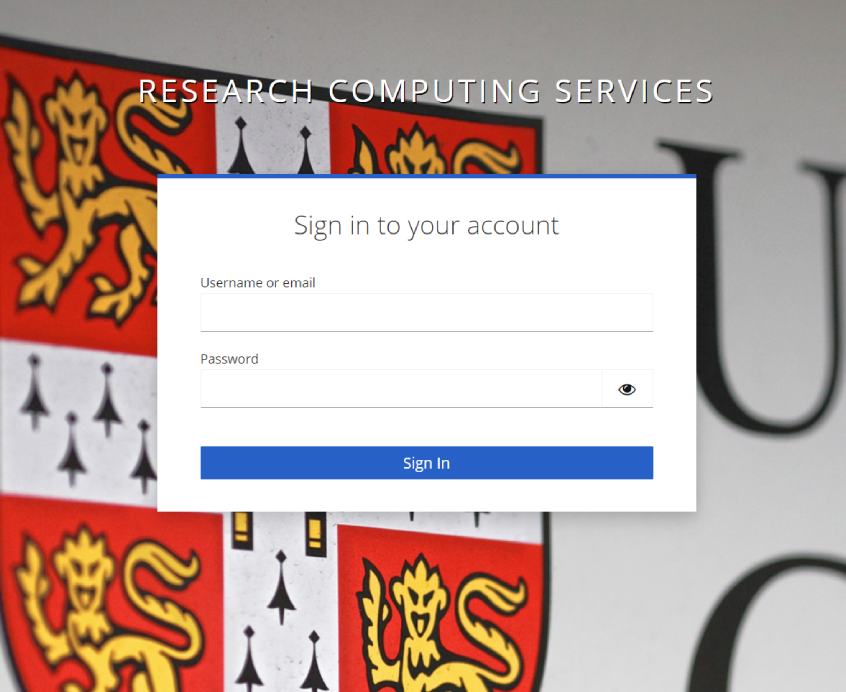
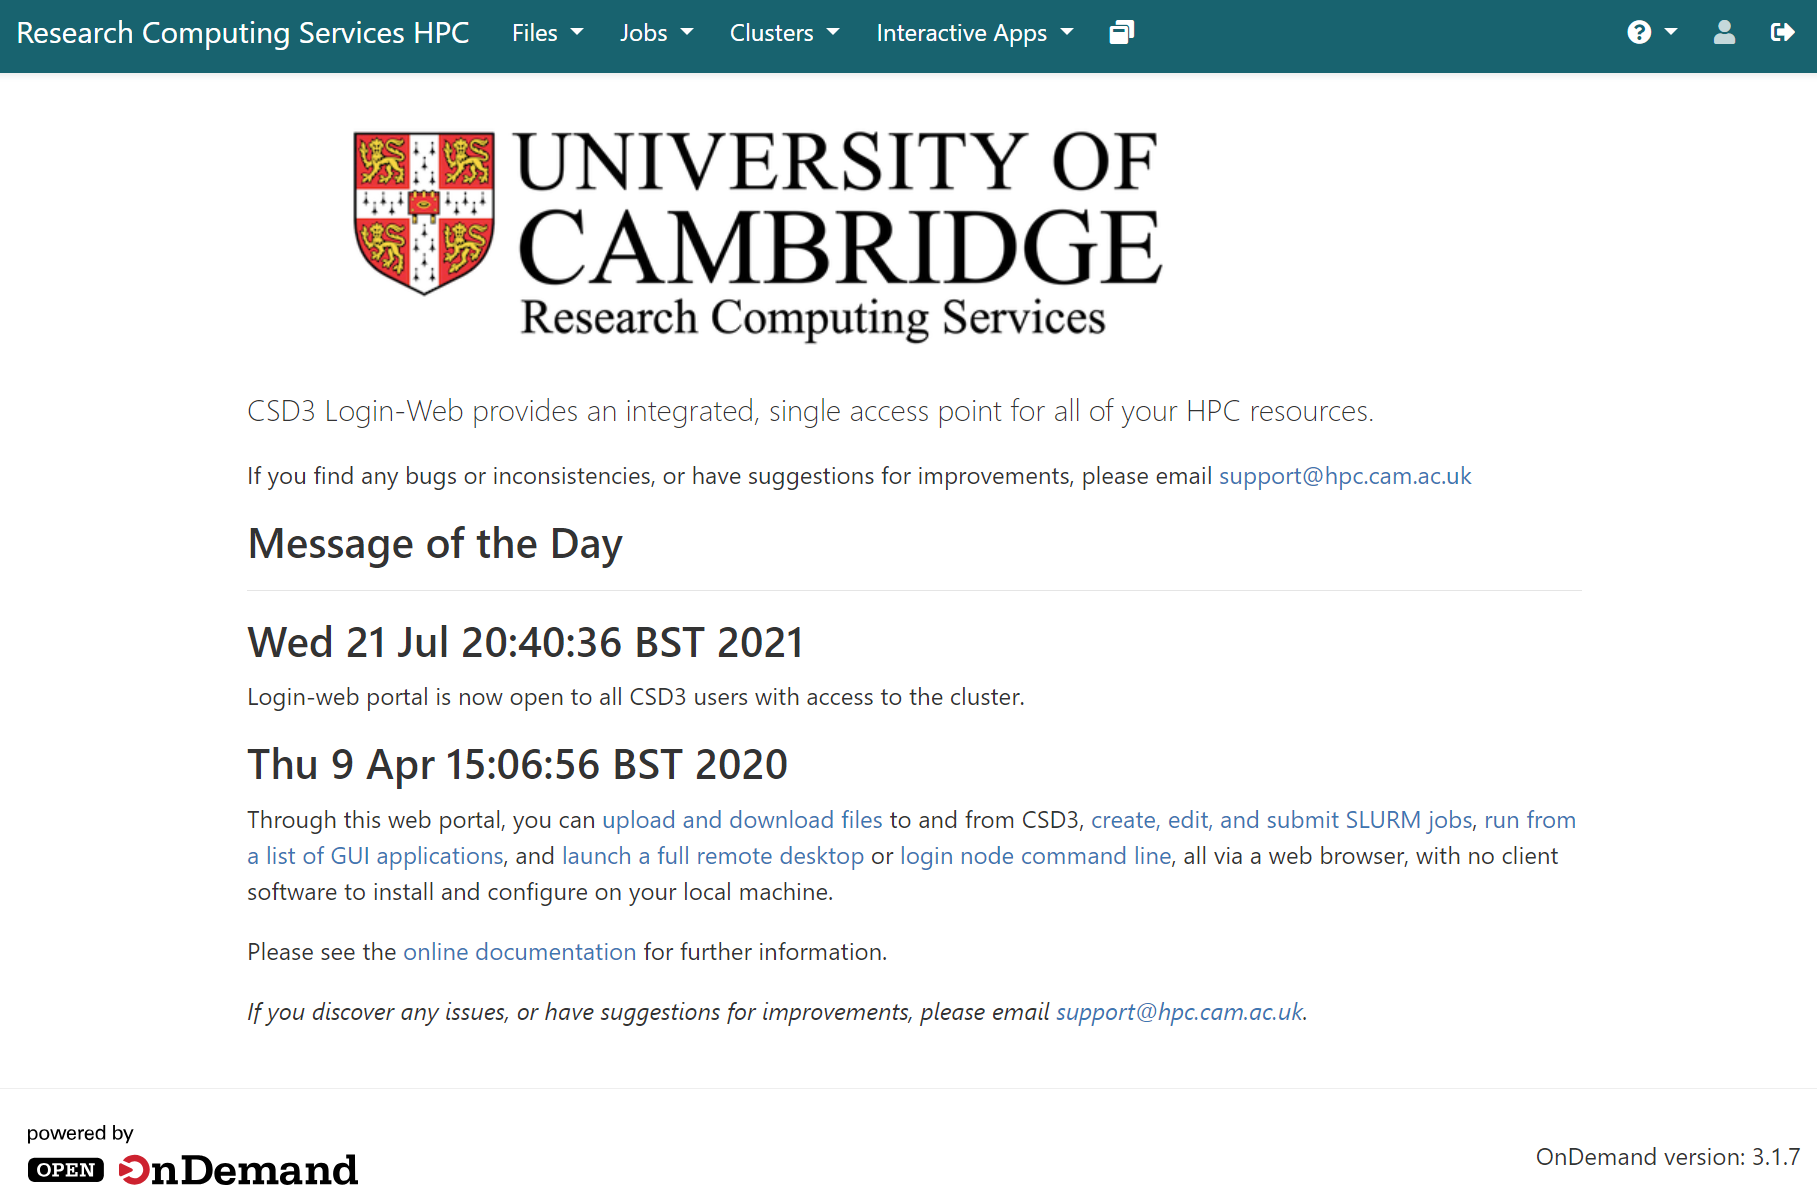
Once completed you will be presented with this page:
Or this page if your browser window is more compact:
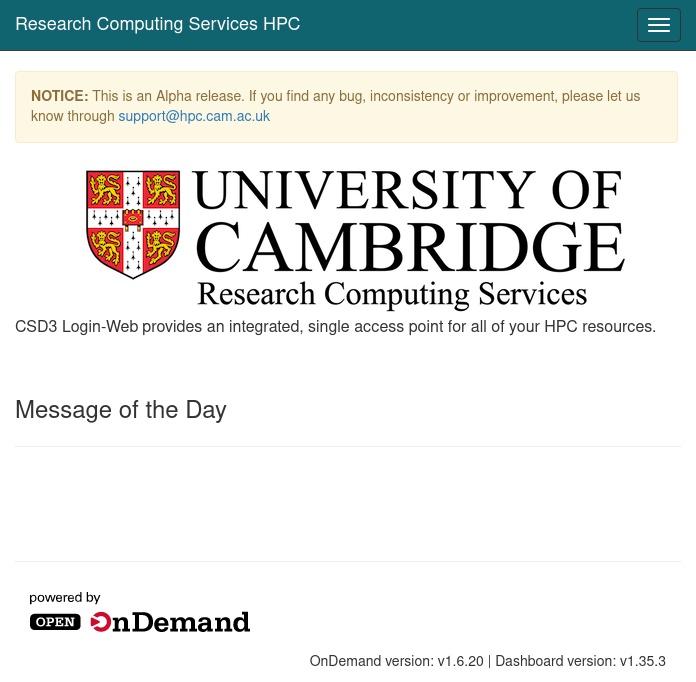
The three-lined icon to the right of the compact page expands when clicked to show the full toolbar available on the non-compact page. At this point, it is possible to access the tools available in Login-Web.
File Transfer and Management
This function allows the transfer of data to and from Research Storage Services project areas, or your CSD3 home directory. To use the file transfer client, select Files in the main menu.

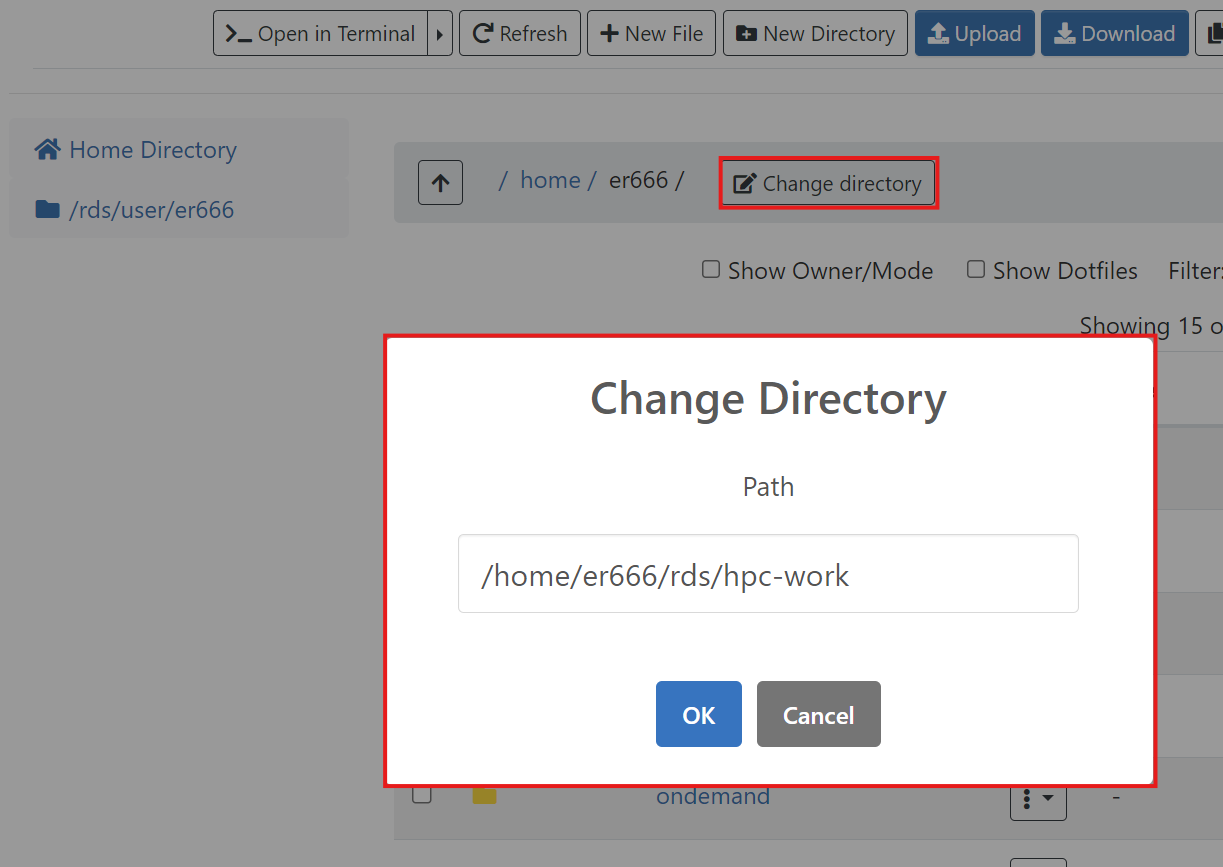
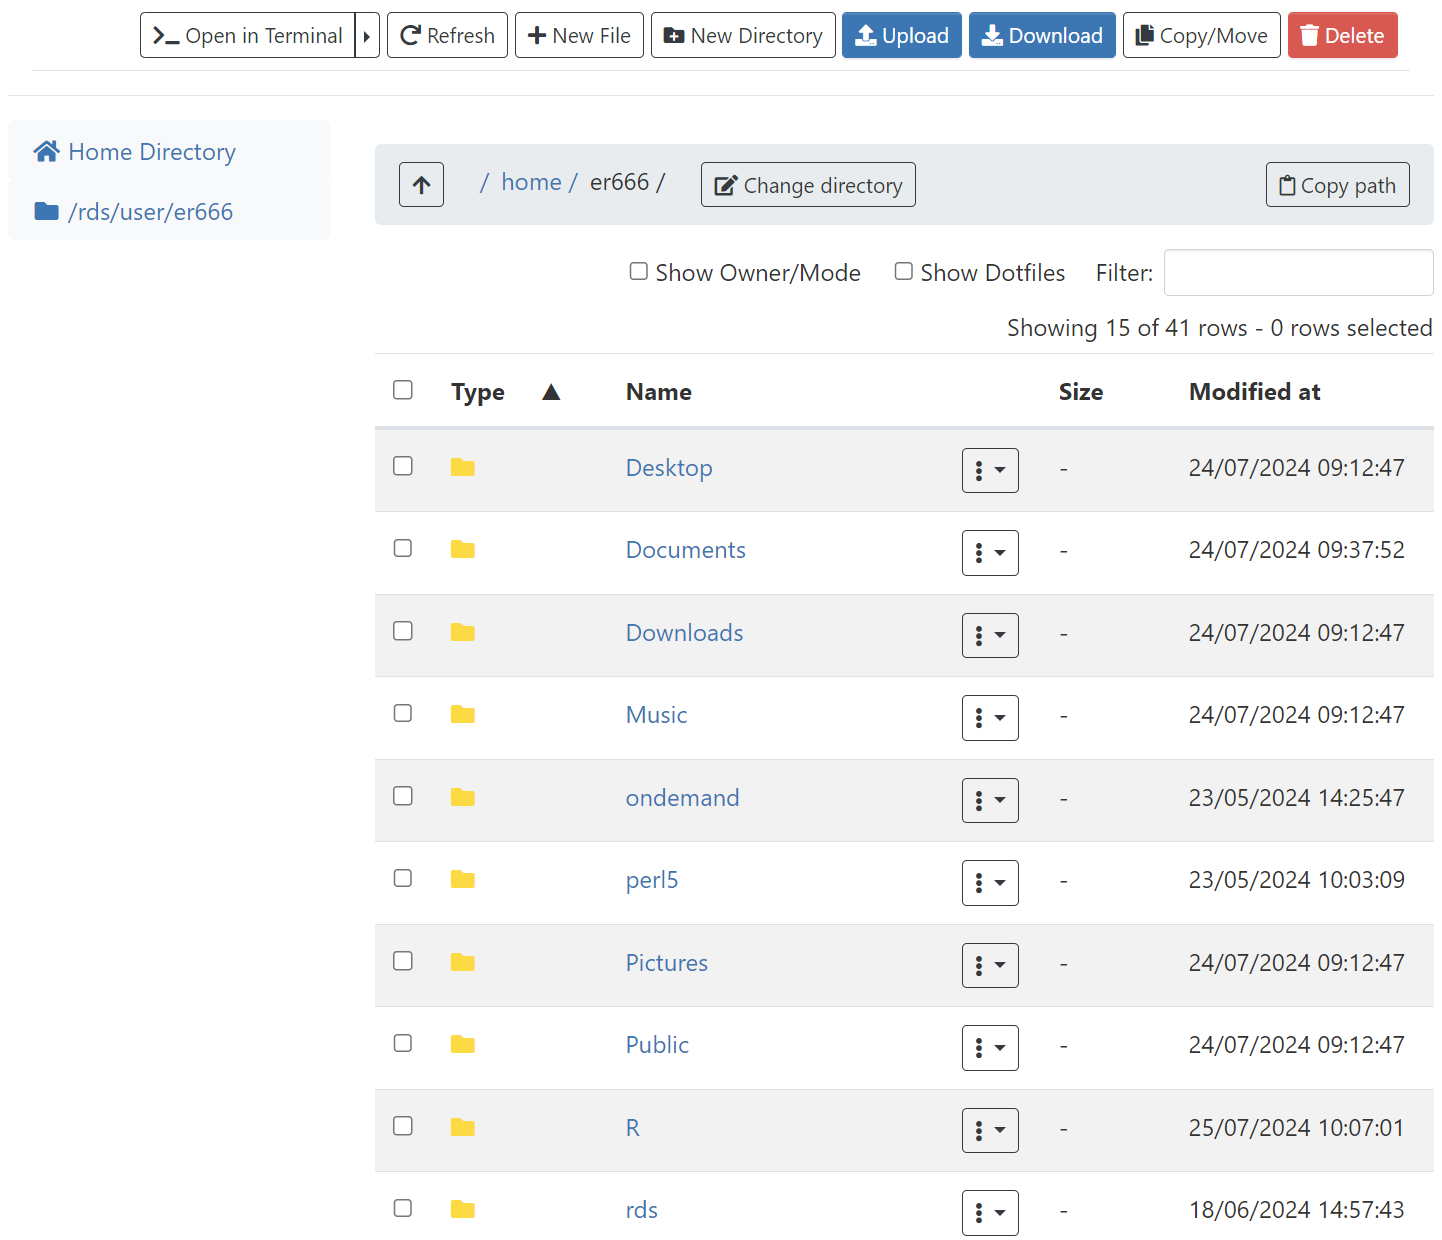
Login-Web provides a web-based File Explorer that can be used to upload and download files to/from your CSD3 home directory or project directory, and copy, delete, rename, and edit files. Below you can see a screenshot of the main interface:
Uploading and Downloading Files
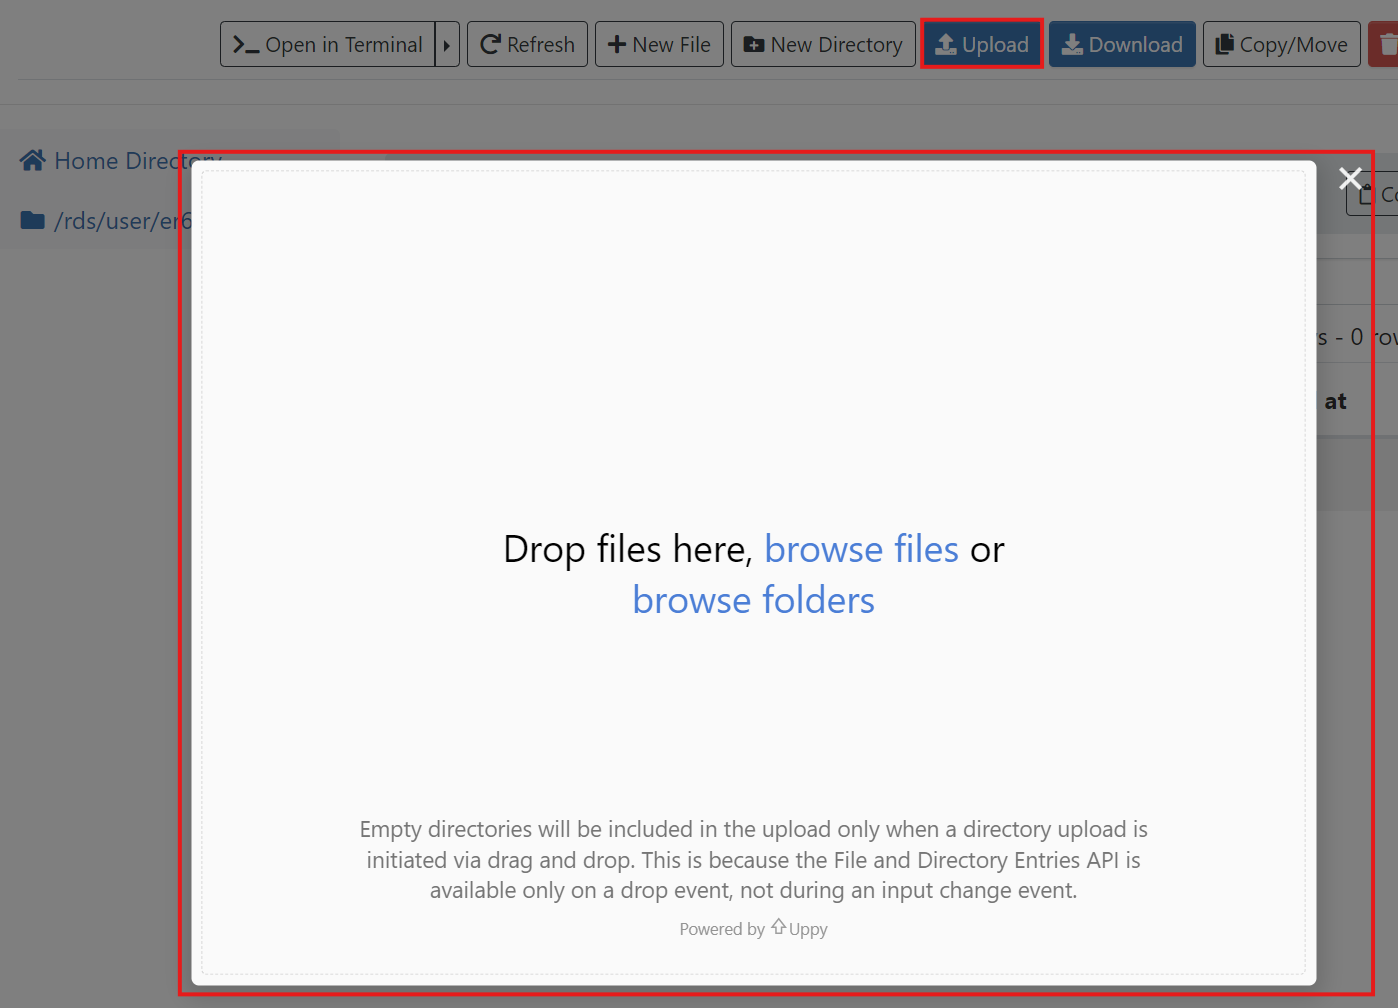
There are several methods of uploading files. The first is to simply navigate to the desired destination, and then drag the file from your local desktop or window navigator to the Login-Web window. You can also click the Upload button to open a dialog that will allow you to navigate your local computer and select which files you want to upload. This process is highlighted in the image above.
To download files, you must select the file or files you wish to download, and then use the Download button. If you select multiple files (Ctrl + Mouse click or Shift + Mouse click) or a folder, the server will zip the files up and download a single zip archive to your desktop machine.
File Operations
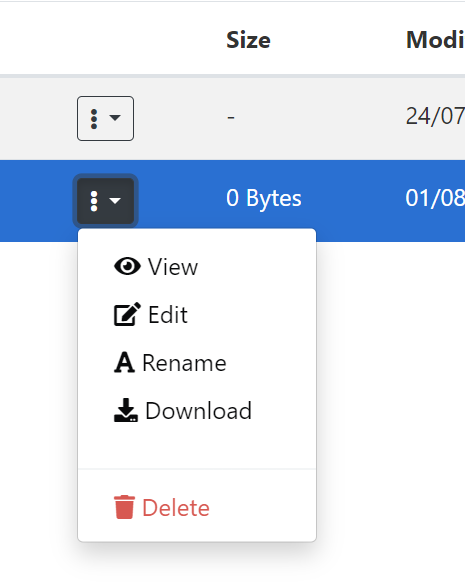
Most file operations can be accomplished by selecting the file in the main window pane and selecting the desired operation from the dropdown menu found by clicking the vertical ellipsis on the file.
Viewing and/or Editing a File
The application also includes several built-in file editors. To access these editors and viewers, select the vertical ellipsis dropdown menu file you wish to view or edit, and select Edit from the main menu. This will open up a text editor in a new tab.
Job Management
This function allows you to create, edit, submit, and monitor jobs. To access the job management tools, use the Jobs menu.

Login-Web provides two related job management tools: one allows you to create and submit jobs via your web browser, and the other allows you to monitor queued and running jobs.
Job Composer
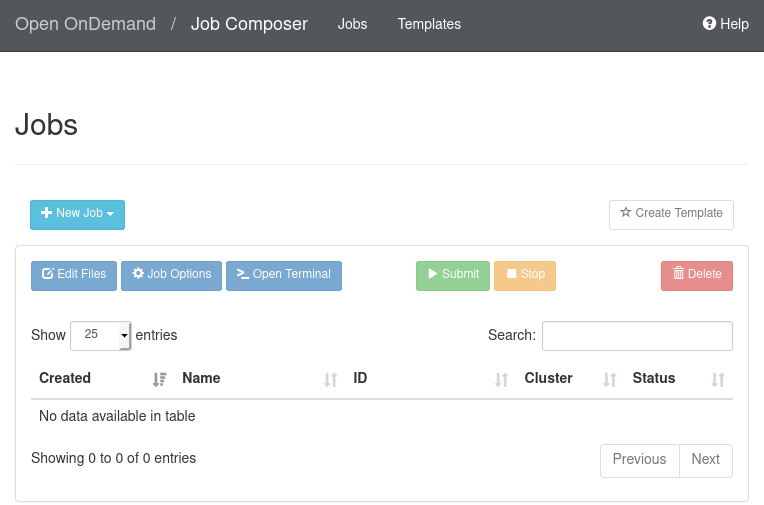
Selecting Job Composer in the Jobs menu will open an application which allows you to inspect the results of jobs submitted, and to create new jobs and submit them to the cluster via this tool.
New Job
Use the following steps in order to create a job:
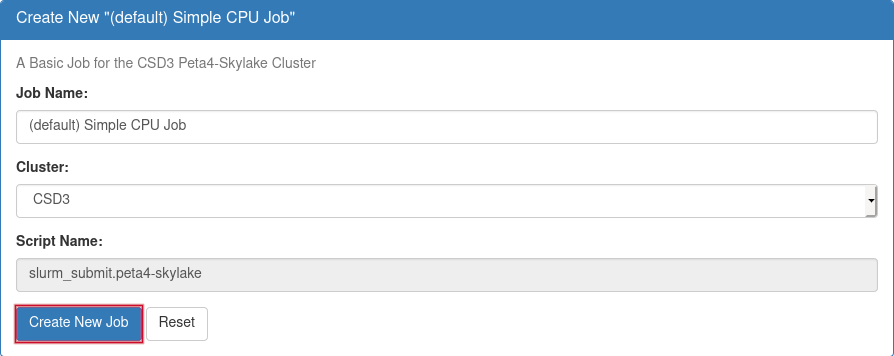
- Create a new job by using an existing job template by clicking
+New Joband thenFrom Template(or alternativelyFrom Default Template). Select the job template to copy, then clickCreate New Job. The template directory will be copied and a new job row will be added to the top of the jobs table on the page titledJobs:
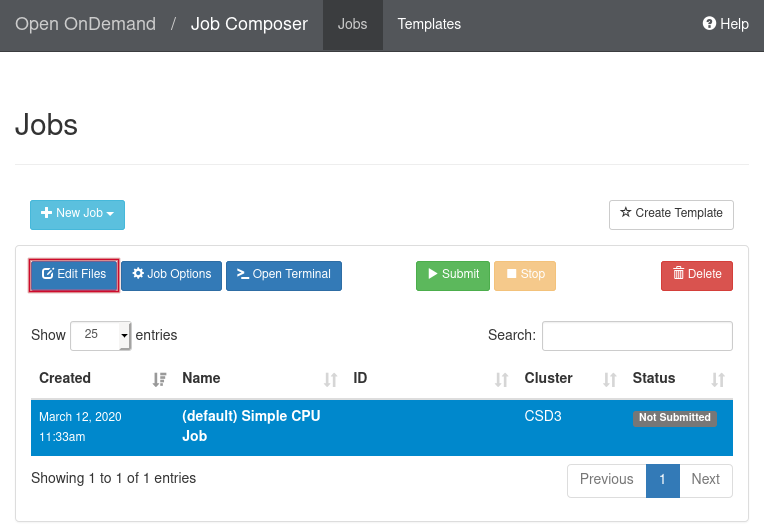
- Select the job, then modify and/or add any files to this job by clicking
Edit Files:
- Select the job and click
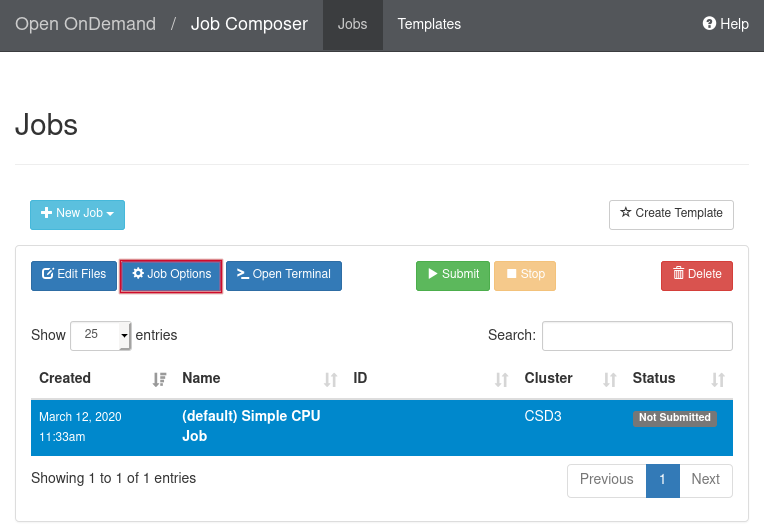
Job Optionsto change the cluster, job name, or job script, if necessary:
- At this point, you can submit the job using the green
Submitbutton from theJobspage; or return to this job later to modify it further. You can also monitor the job status here. Currently you must reload the page to see job status changes.
Job Management
On the main screen for Jobs, click on a job to examine it.
Submit Job
If the job has not been submitted, the Green Submit button will be active, and will submit the selected job to the queue.
Stop Job
The Stop button will allow you to kill a running job.
Delete Job
The Delete button will allow you to delete a job.
Active Jobs
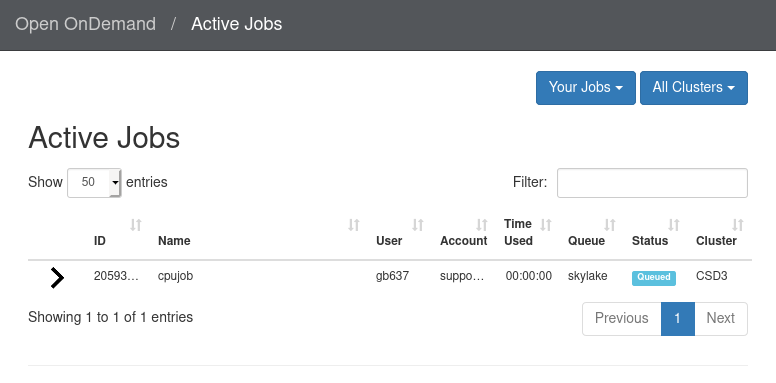
The Active Jobs application will show all of your jobs currently in the queue (running or queued), regardless of how the jobs were submitted. You can click the button at the top to switch from:
- All jobs submitted from your CSD3 user account
- All jobs submitted by all CSD3 users
You can also use the Filter tool to search jobs based on system, status (running, queued, or held), CSD3 user account, etc.
Job Inspection
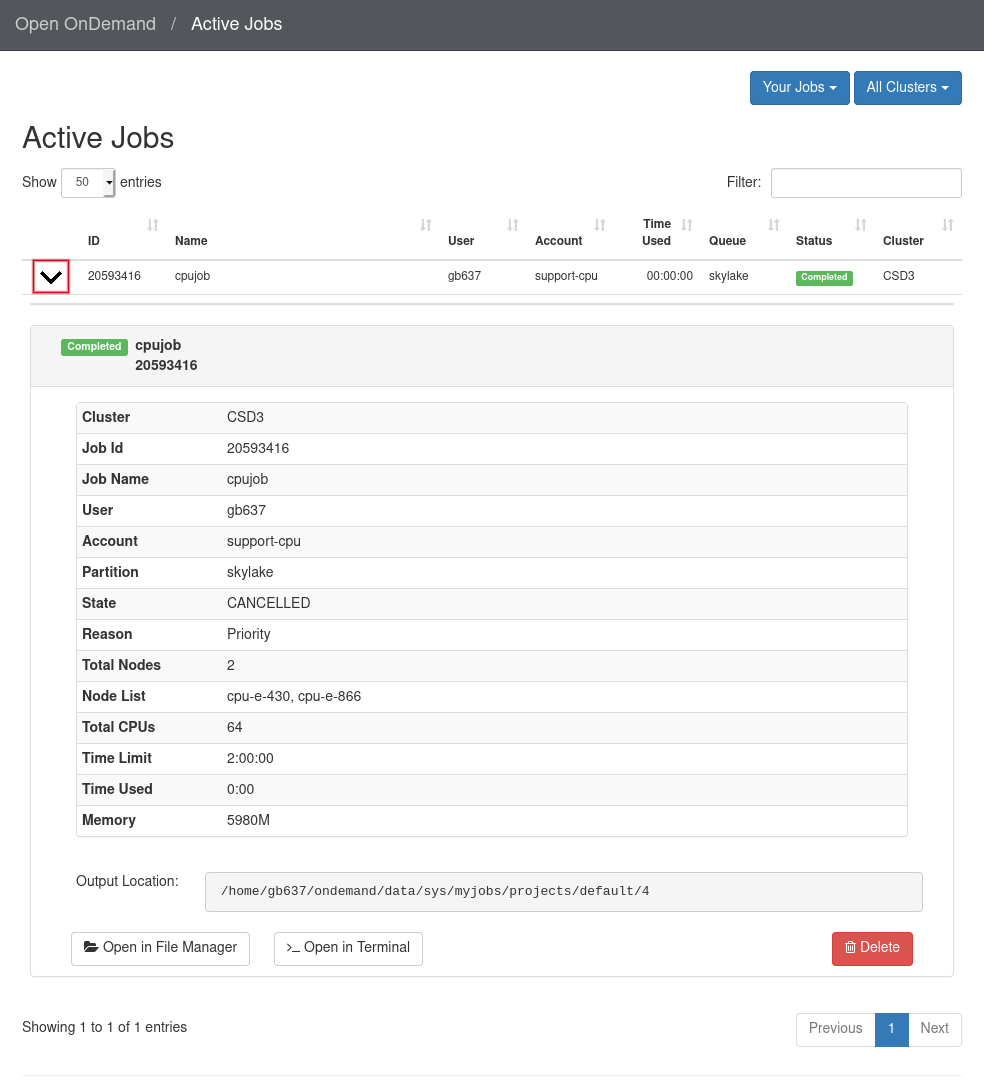
Clicking the arrow to the left of each job will show more information about the job.
Shell Access
Login-Web provides the ability to SSH to a CSD3 login node from inside your web browser. To obtain a terminal, select the Clusters menu and choose the desired flavour of login node.

Note
Please note that this action will open a “pop-up” window. If your browser is configured to block pop-ups, you will not see the terminal.
Interactive Apps
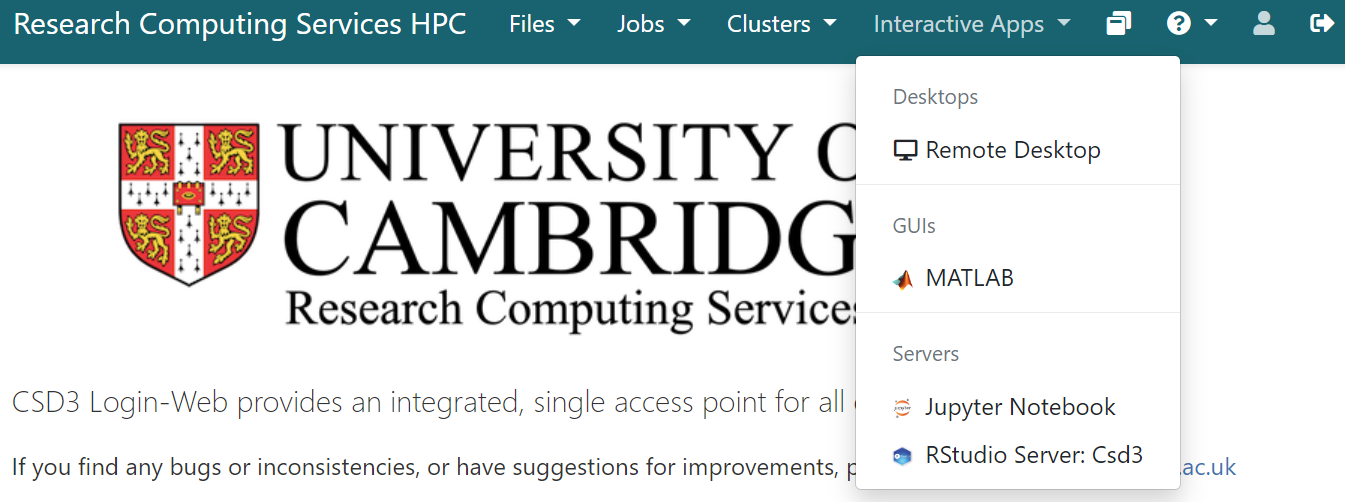
This function launches a browser-based remote Linux desktop on which to run GUI applications, without the hassle or performance problems associated with X11 forwarding or custom VNC clients. To use this feature, please select an item from under Desktops, GUIs or Servers from the Interactive Apps menu.
Remote Desktop
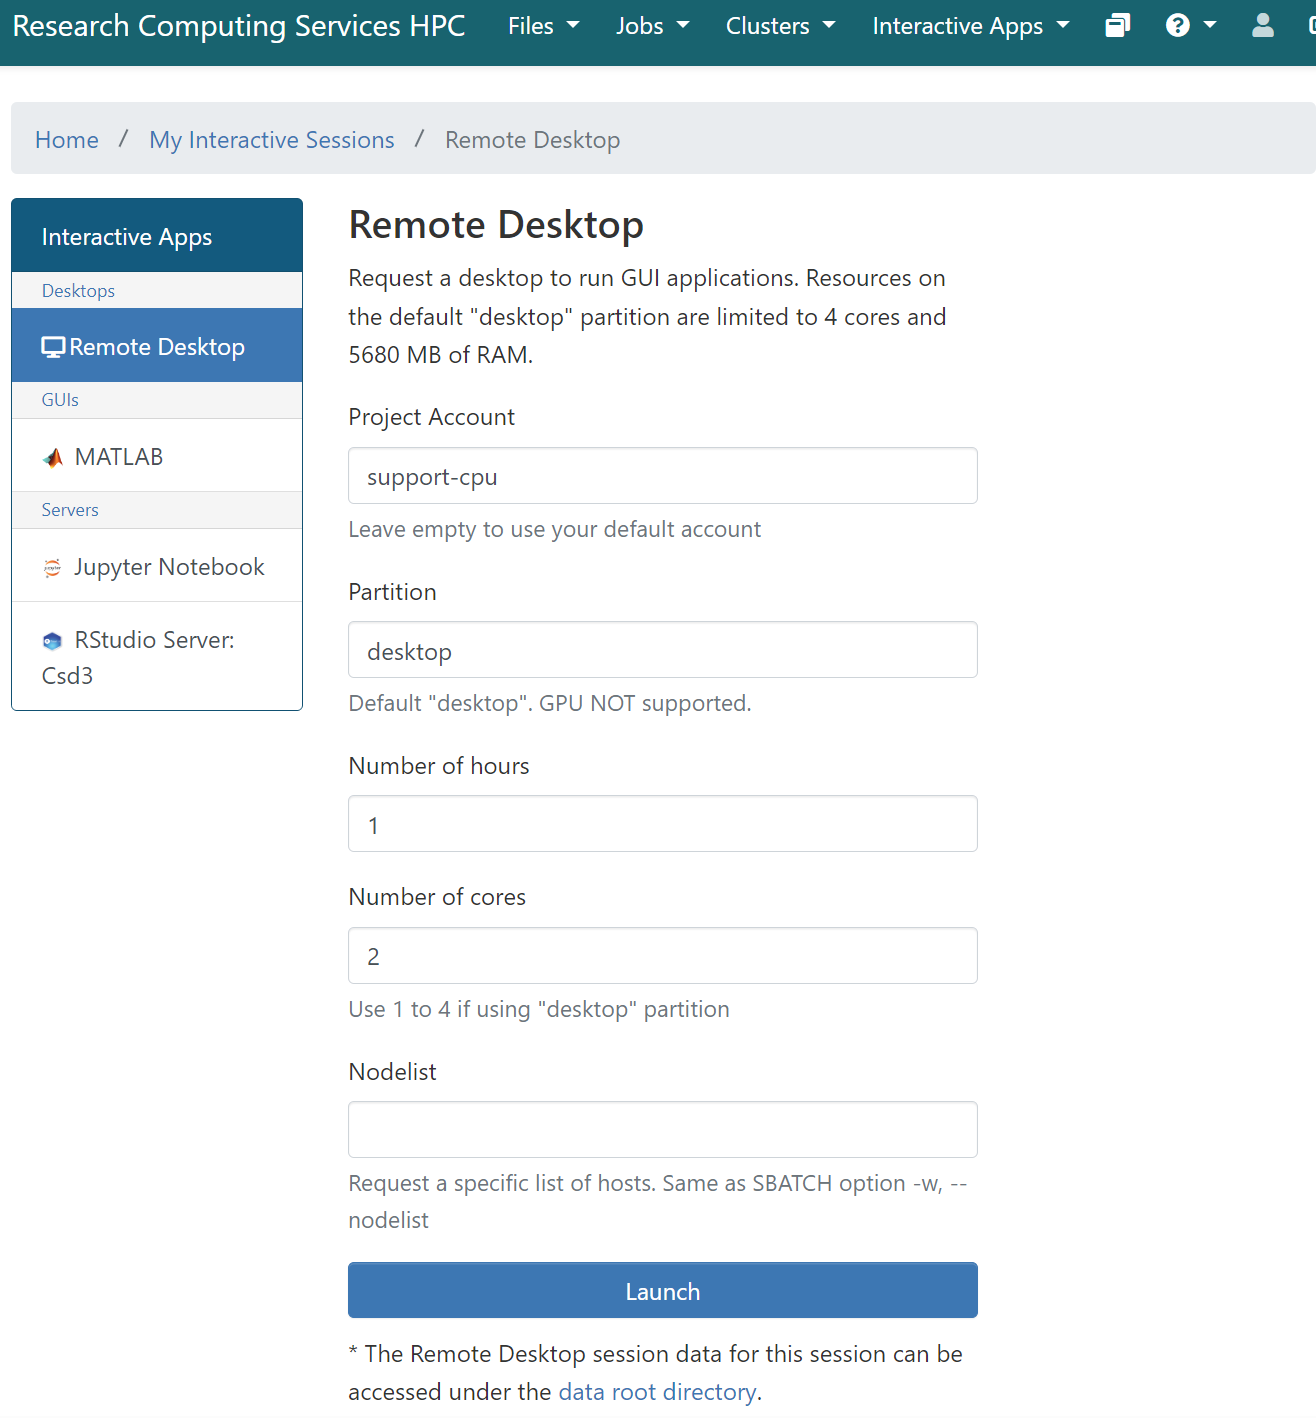
This option will launch a full remote desktop in a browser tab. Select Remote Desktop and you will arrive on the page shown below. Click Launch. You may need to wait for a few minutes for the application to launch.
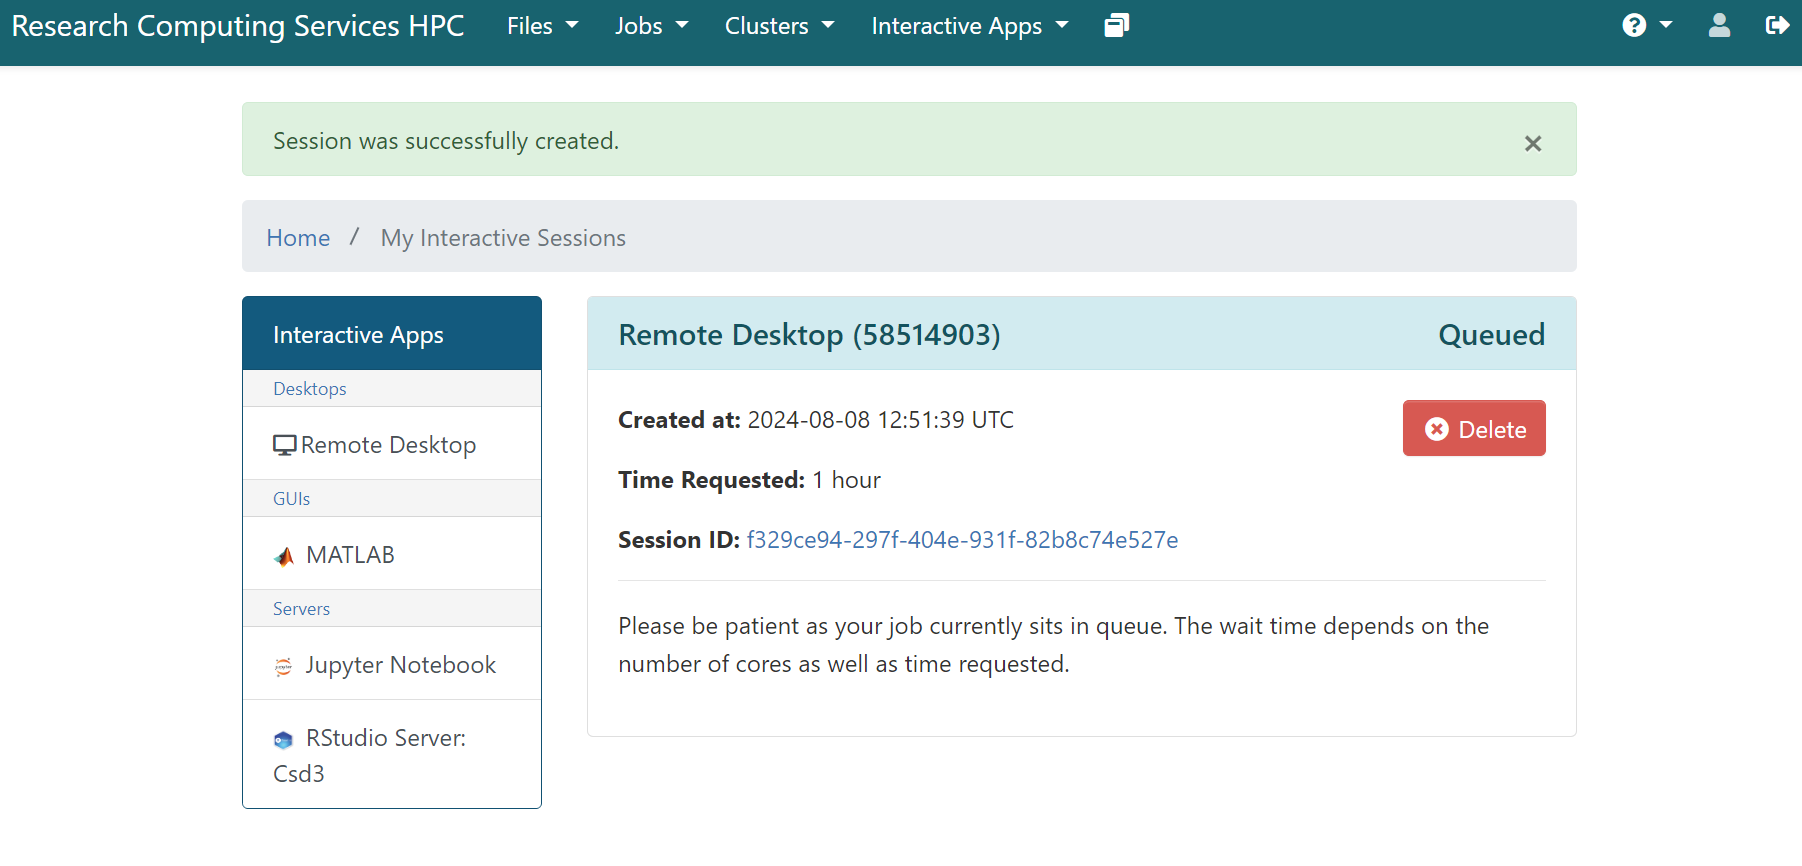
To access the desktop you can choose from Launch Remote Desktop to reach your desktop as shown below and interact with it normally, or View Only (Shareable Link) to share your desktop with colleagues in View Only mode.
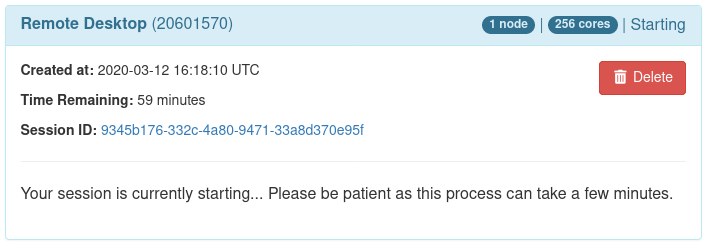
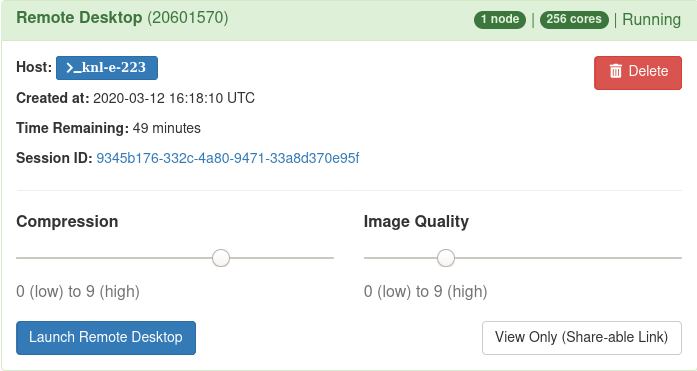
Once the desktop is ready to be used, your session manager will show a job which looks like the image below:
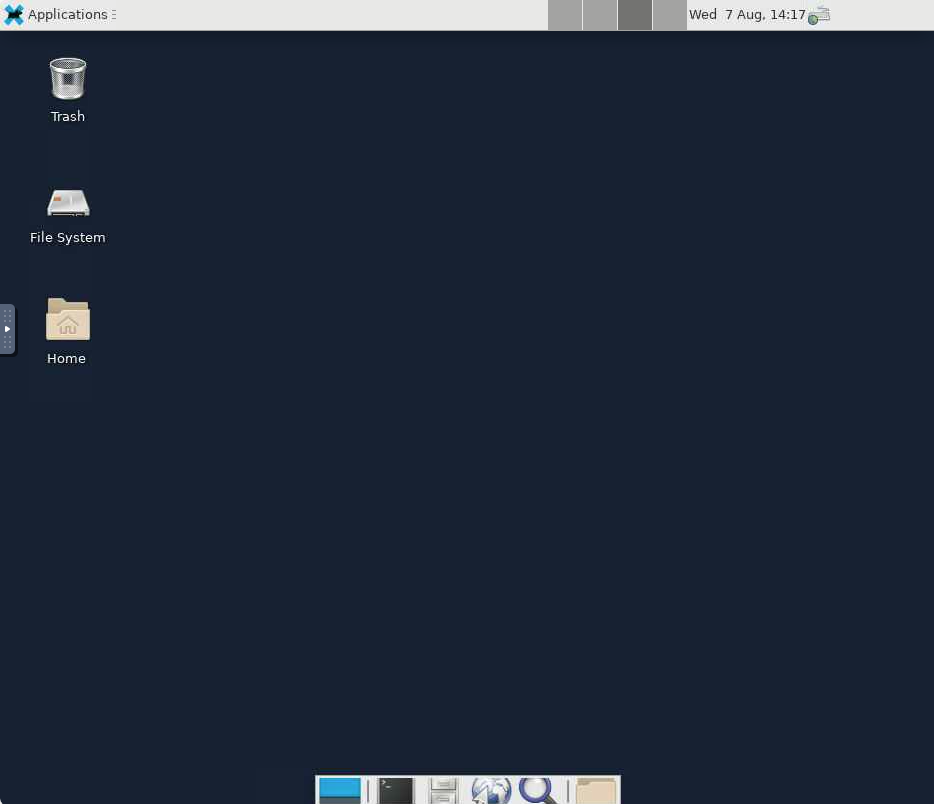
The remaining options shown under Interactive Apps will use the same functionality to launch specific applications, rather than full desktops.
MATLAB
MATLAB allows matrix manipulations, plotting of functions and data, implementation of algorithms, creation of user interfaces, and interfacing with programs written in other languages, including C, C++, C#, Java, Fortran and Python.
Accessing through Login-Web
All the desktop apps can be found within the Interactive Apps drop-down in the Login-Web web portal as shown in the image below:

After selecting MATLAB, you will arrive at this page:
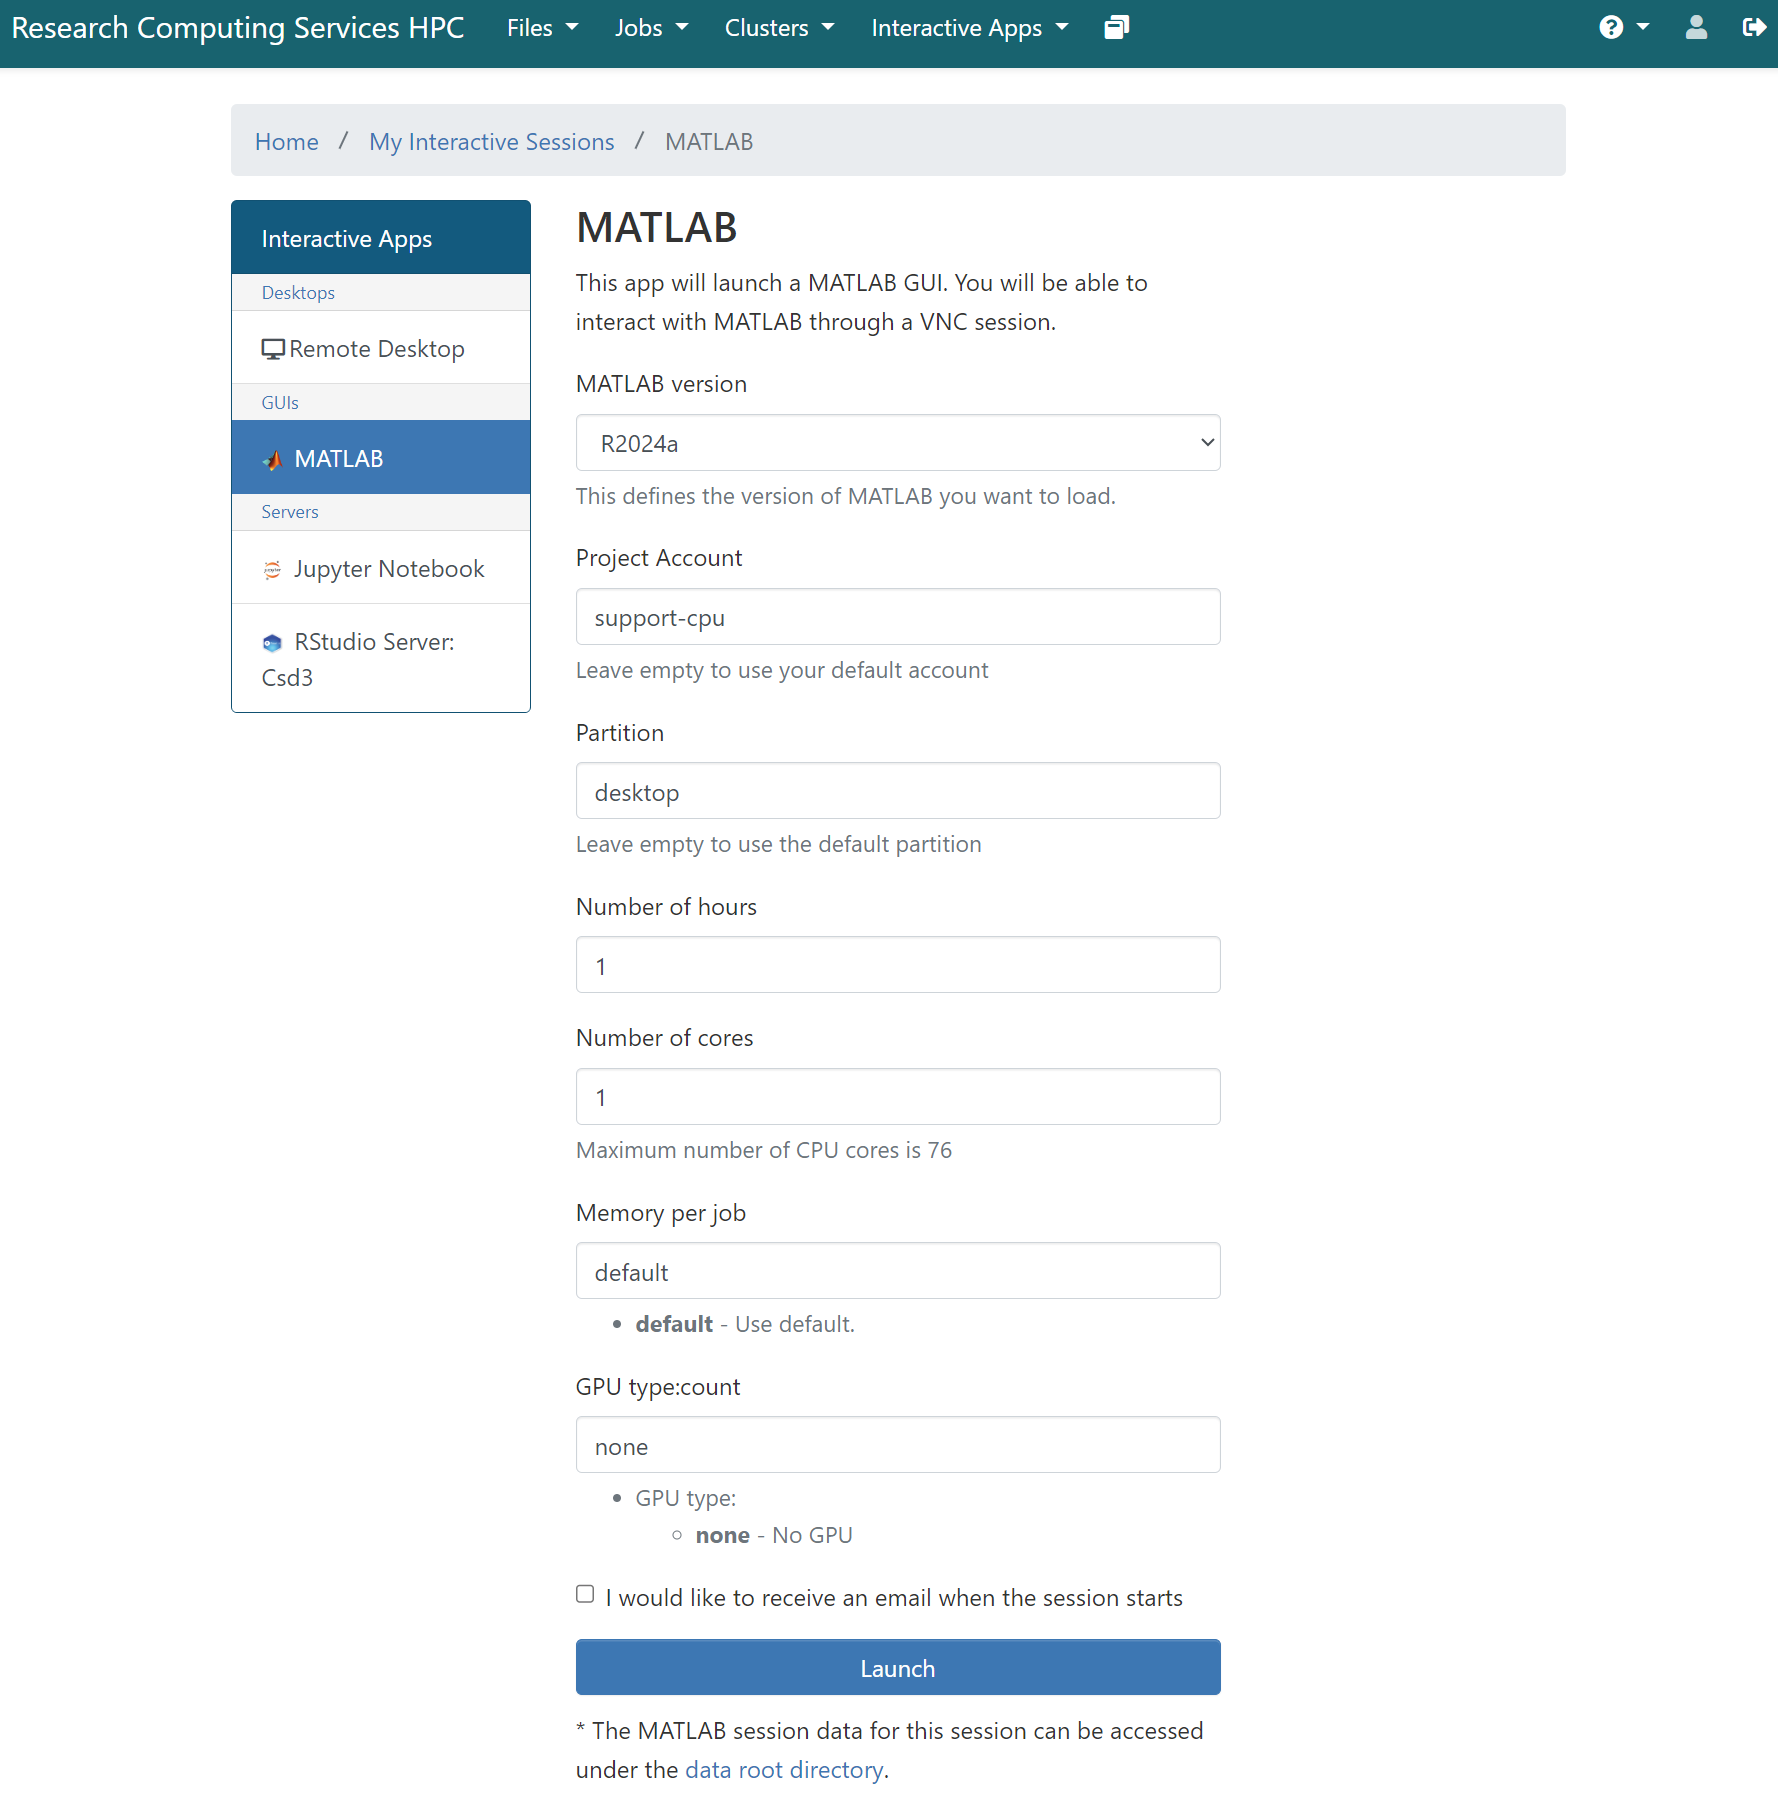
Here you can select the resources you would like your MATLAB session to have using the menu on the right hand side of the page. If you’d like to receive an email notifying you of when this has happened, please select I would like to receive an email when the session starts. After clicking Launch, a new session will be queued. Once the session is active your page will look like the image below:
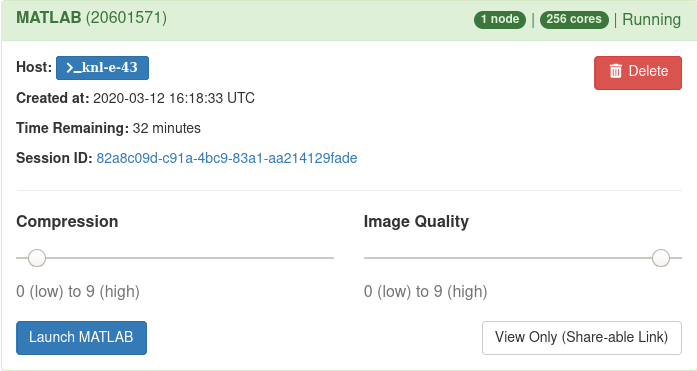
To access the interface you can choose from Launch MATLAB to reach the application as shown below and use it normally, or View Only (Shareable Link) to share the application interface with colleagues in View Only mode.
Using MATLAB
Once you have entered your session, you should see a new tab. Allow MATLAB a moment to start up, then your screen should eventually look like the image below:
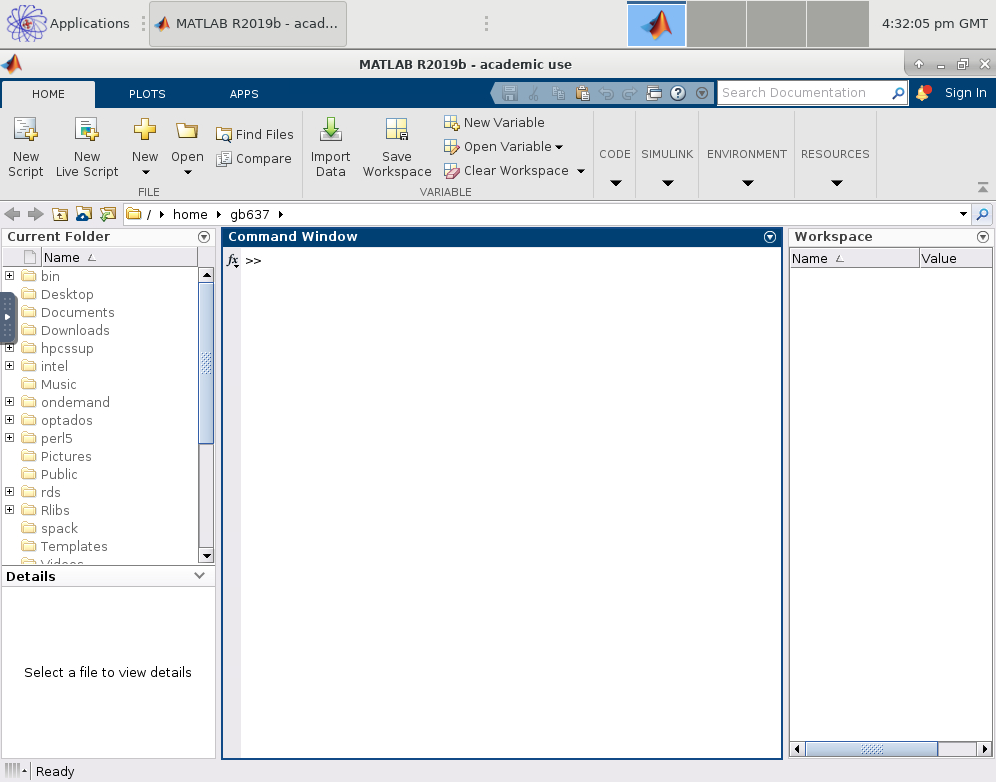
This is a typical MATLAB interface that should be familiar:
- Current Folder — Access your files.
- Command Window — Enter commands at the command line, indicated by the prompt (>>).
- Workspace — Explore data that you create or import from files.
- The desktop also includes these applications:
- Web Browser
- Terminal Emulator
- File Manager
Further Reading: MathWorks support page
Jupyter Notebook
The Jupyter Notebook is an open-source web application that allows you to create and share documents that contain live code, equations, visualisations and narrative text. Uses include: data cleaning and transformation, numerical simulation, statistical modeling, data visualisation, machine learning, and much more.
Accessing through Login-Web
All the desktop apps can be found within the Interactive Apps dropdown in the Login-Web web portal. After selecting Jupyter, you will arrive at this page:
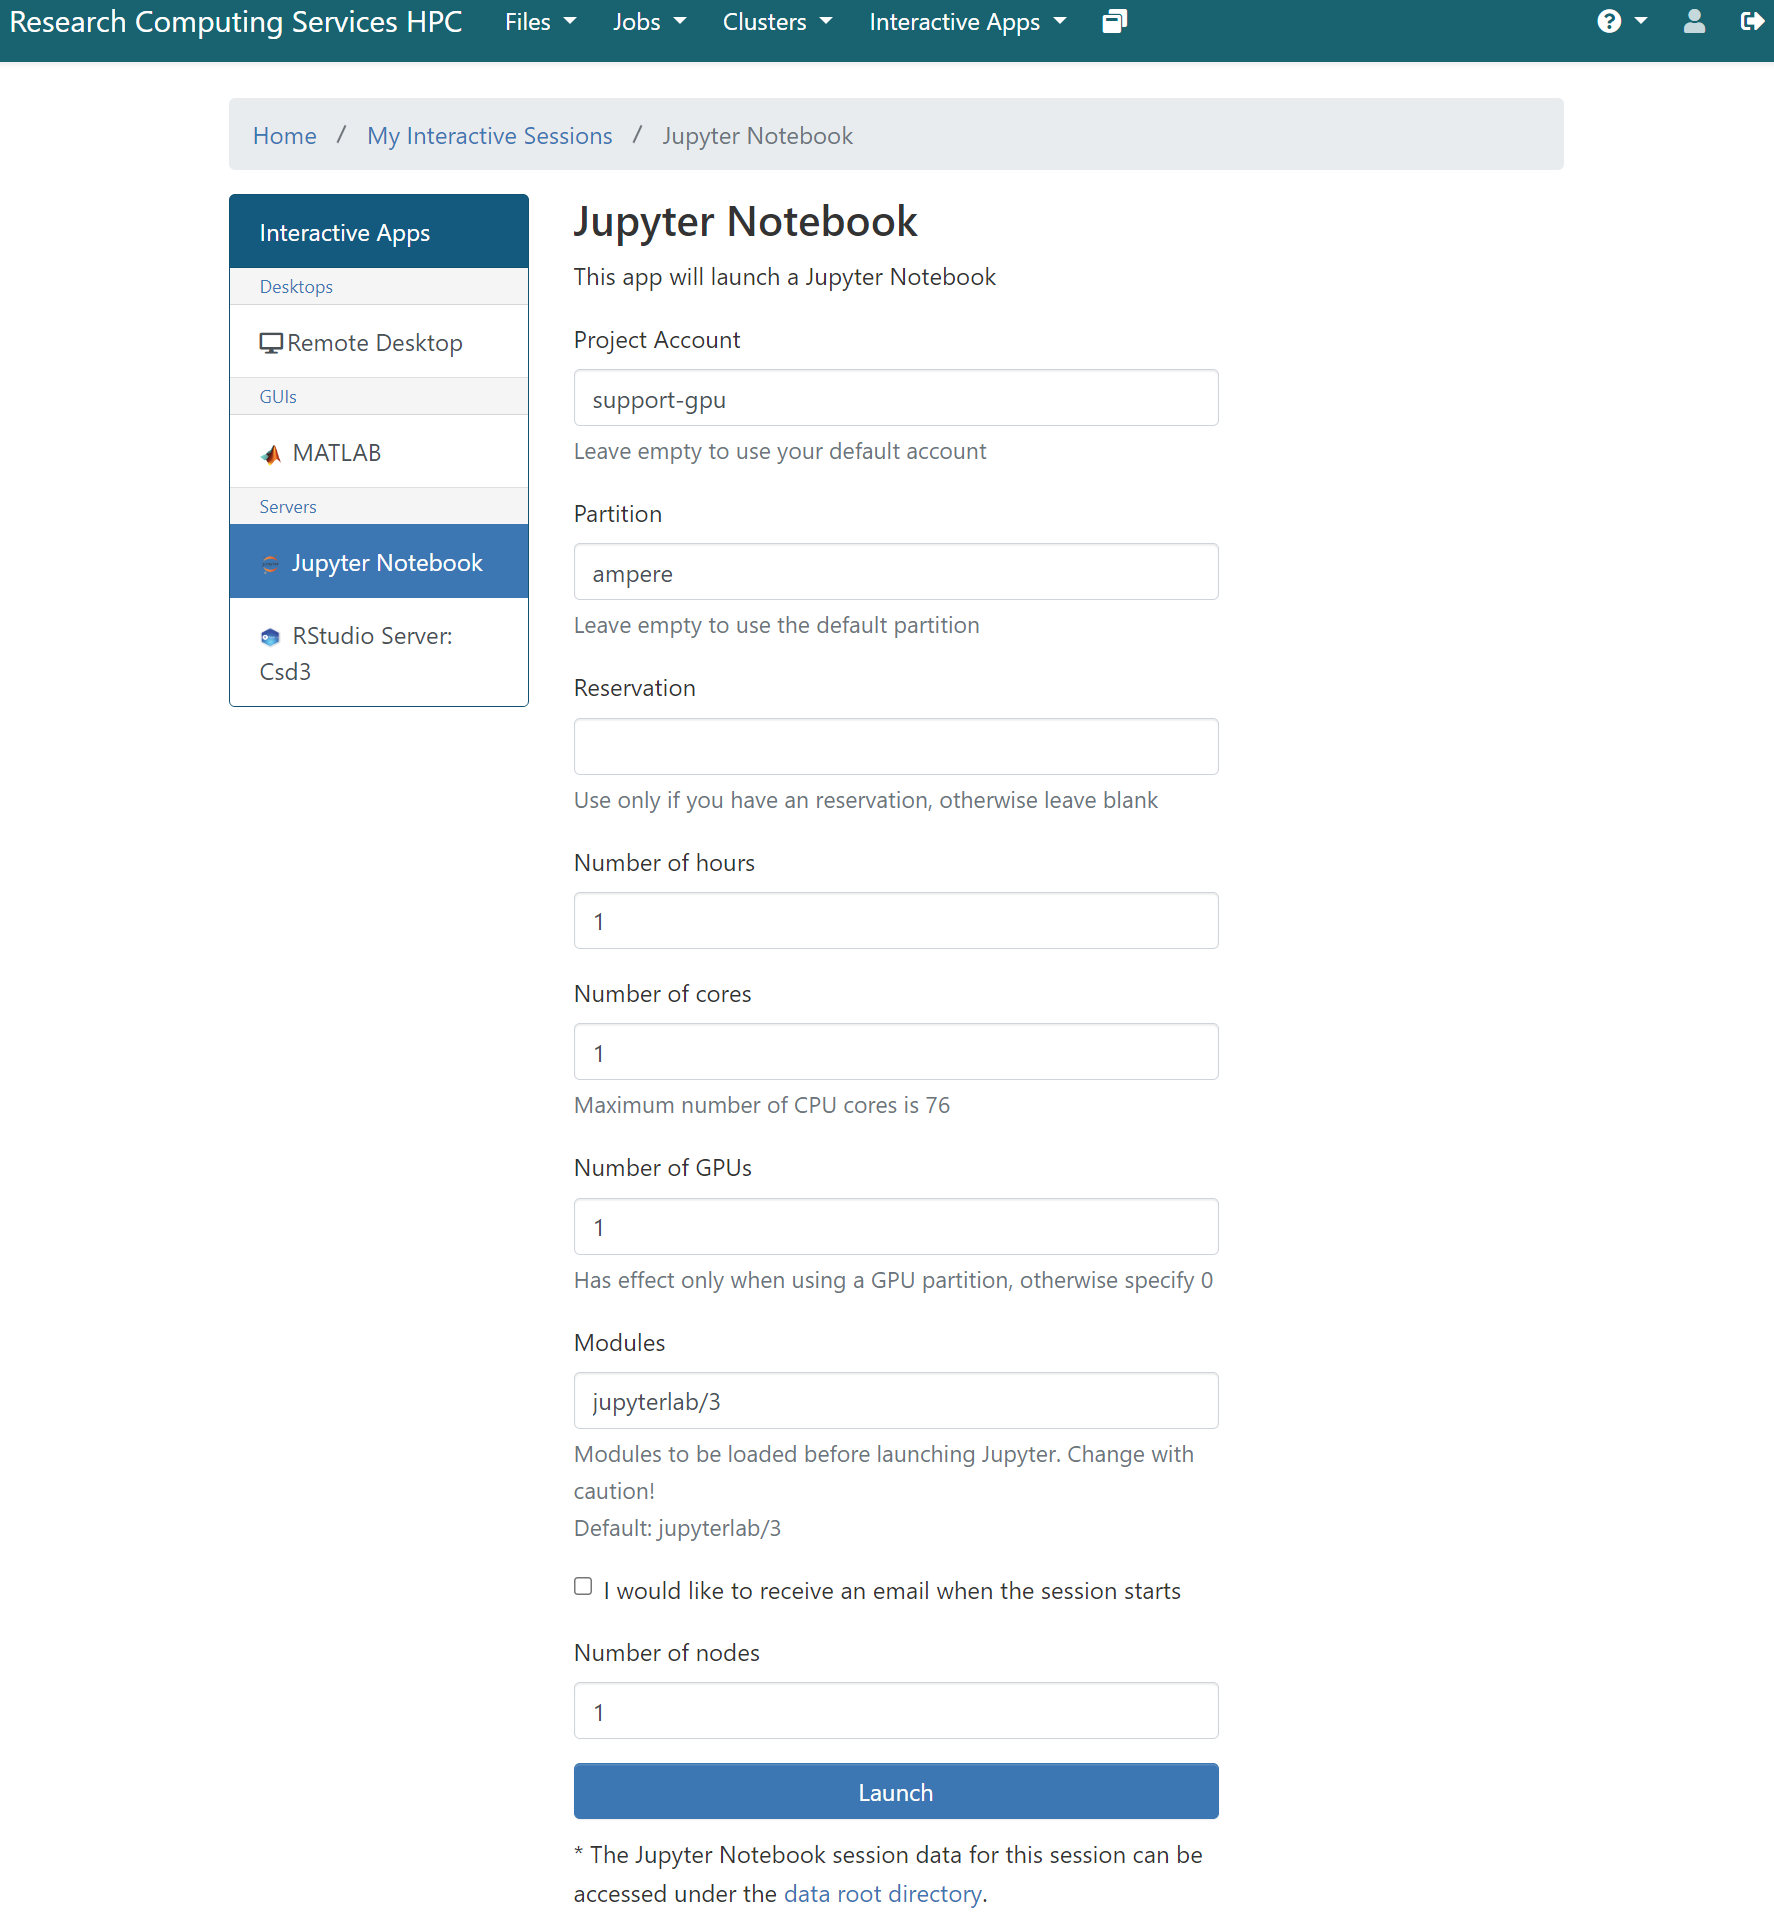
Here you can select the resources you would like your Jupyter session to have using the menu on the right hand side of the page. After you click Launch, a new session will be queued. Once the session is active your page will look like the image below:
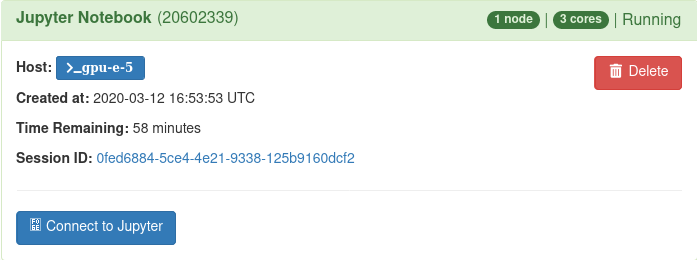
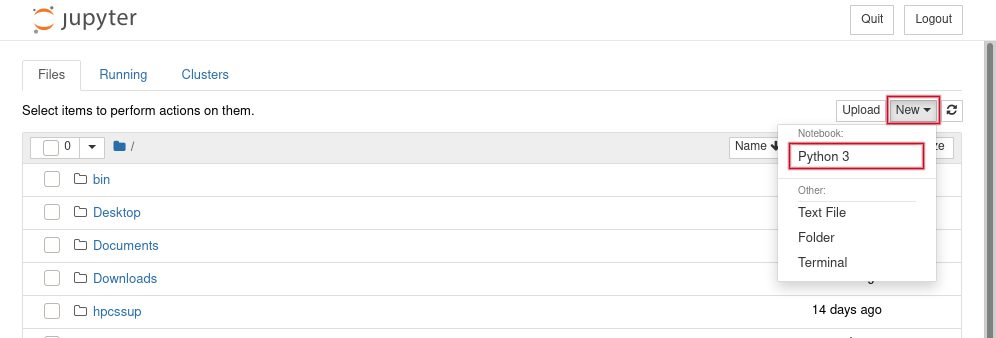
You can choose Connect to Jupyter to start your session and create a New Python 3 notebook.
This is a new notebook with a familiar interface:

Adding virtual environments
To use your own virtual environments in the Jupyter Notebook app, you need to add them externally. Use the following steps to do so:
Use the
Remote Desktopapplication to log to your CSD3 account, then start aTerminal.If needed, create a new virtual environment using the commands described in the section Setup Jupyter on CSD3
Activate the virtual environment (otherwise, your installed packages won’t be registered)
Deploy the python module ipykernel with the command line:
pip install ipykernel
Add your virtual environment to the Jupyter Notebook as new kernel, with the command line:
ipython kernel install --user --name=<virtual environment name>
Logout.
Start or refresh your jupyter notebook session, as described in the previous section Accessing through Login-Web
Start a new logbook by clicking on the button “New” on the right-hand side:
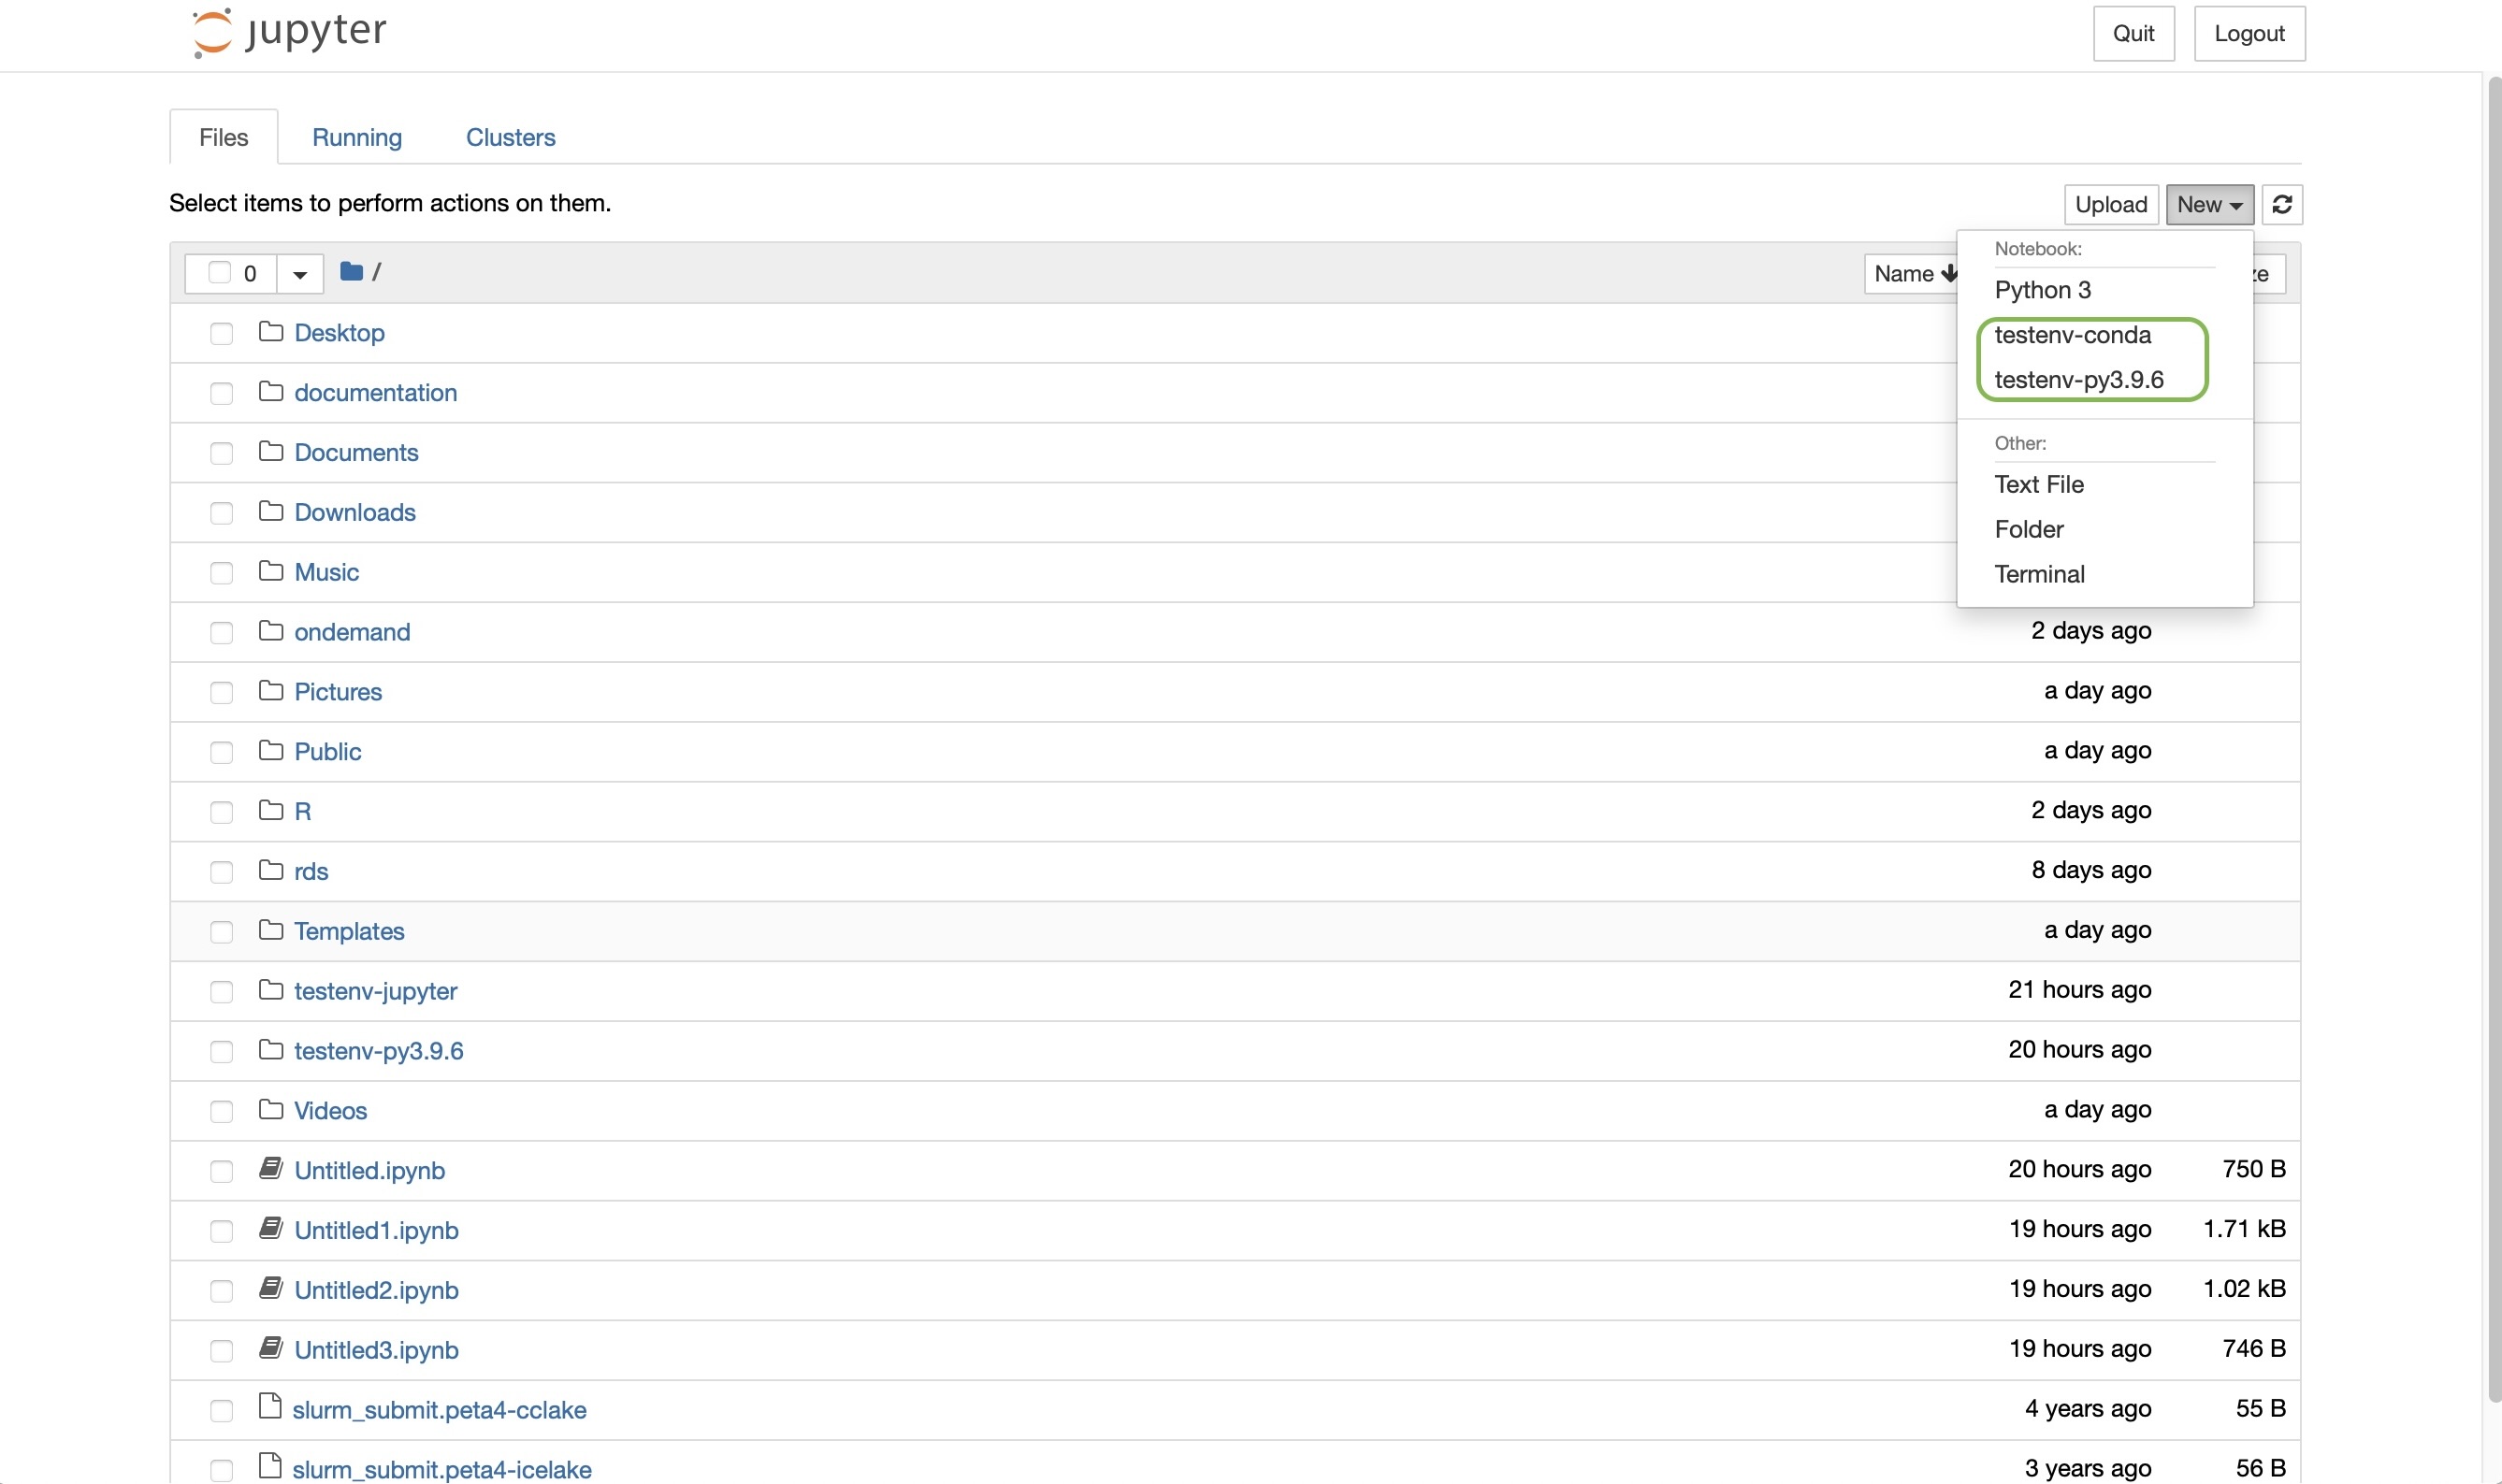
Your virtual environment should be listed under the selected Python3 as shown in the above illustration. Selecting the virtual environment as kernel will give you access to the python packages you have installed in the virtual environment.

Delisting virtual environments
To remove unwanted kernels from the Jupyter notebook:
Use the
Remote Desktopapplication to log to your CSD3 account, then start aTerminal.At the prompt:
module load jupyterlab/3
jupyter kernelspec list
The last command should give you the same list of kernels as the jupyter notebook app. Select the kernel to be deleted, then type:
jupyter kernelspec uninstall <myenv>
RStudio server: Csd3
RStudio is an open-source, integrated development environment (IDE) for R. It includes a console, syntax-highlighting editor that supports direct code execution, and tools for plotting, history, debugging, and workspace management.
Starting RStudio on CSD3
From the Interactive Apps dropdown, select RStudio server: Csd3. This should open a job form as shown in the following image:
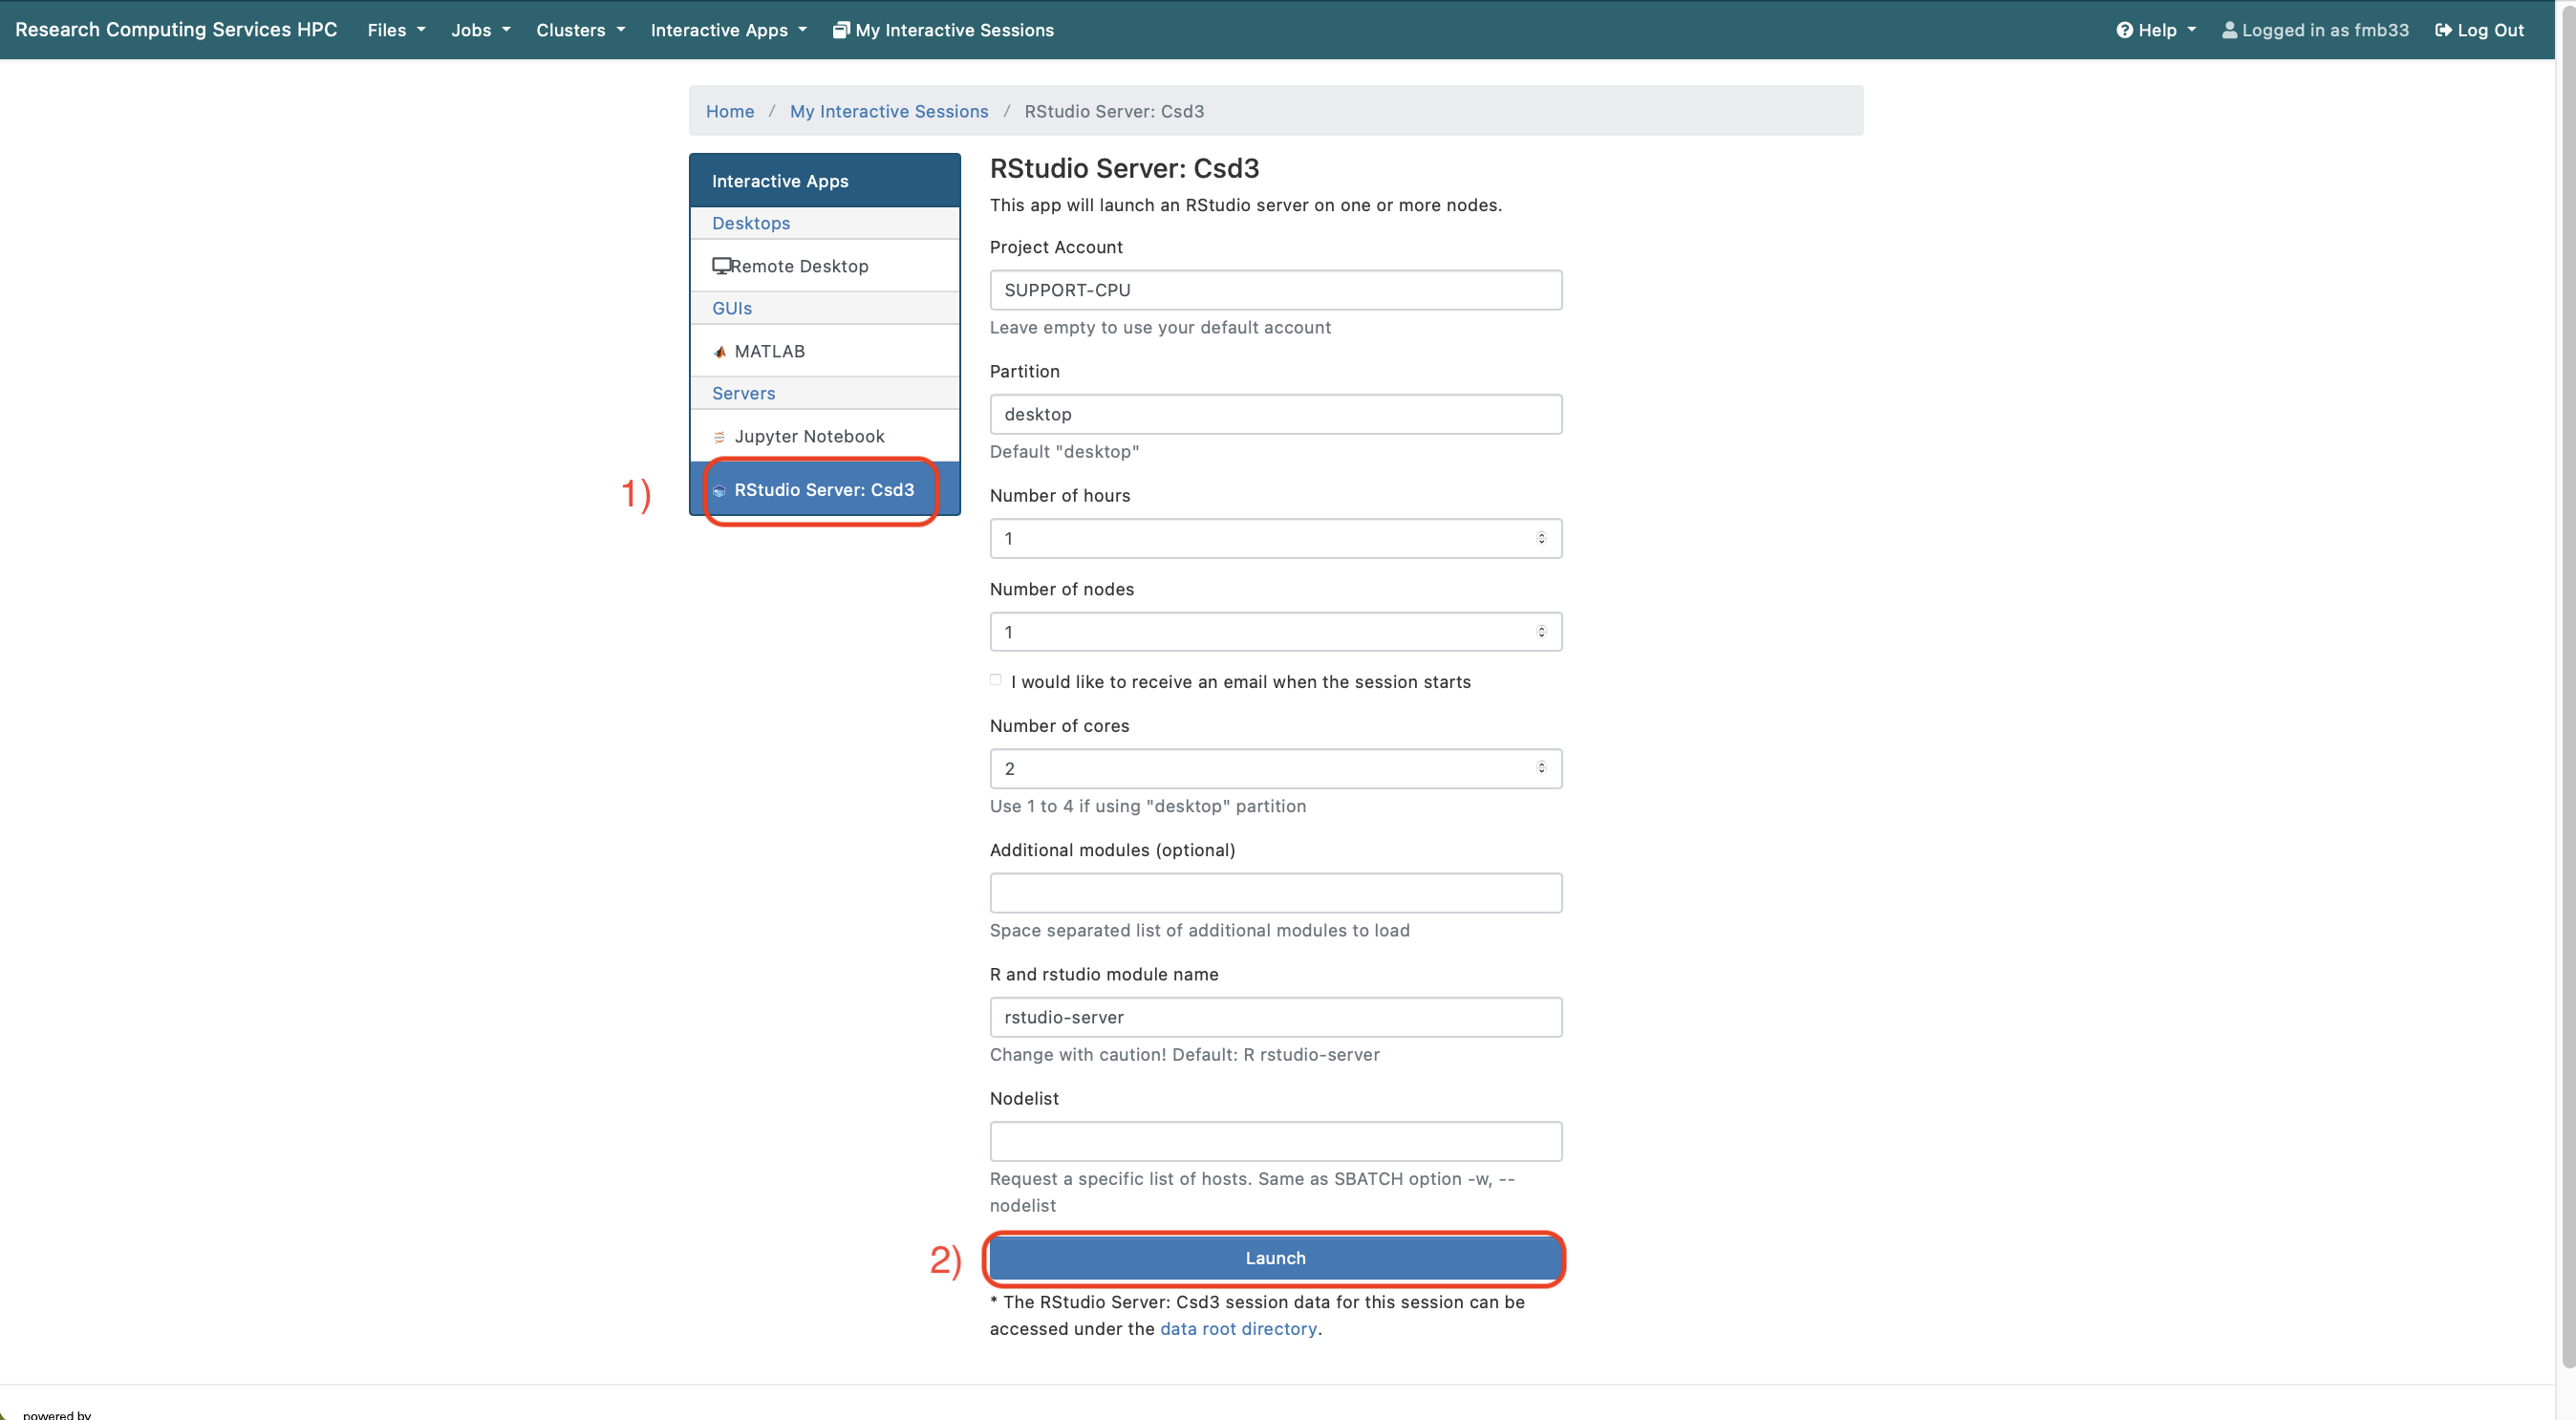
Fill the job details, then press the button Launch at the bottom of the page. This will lead you to your job page.
When the job is starting, the page should look like this:
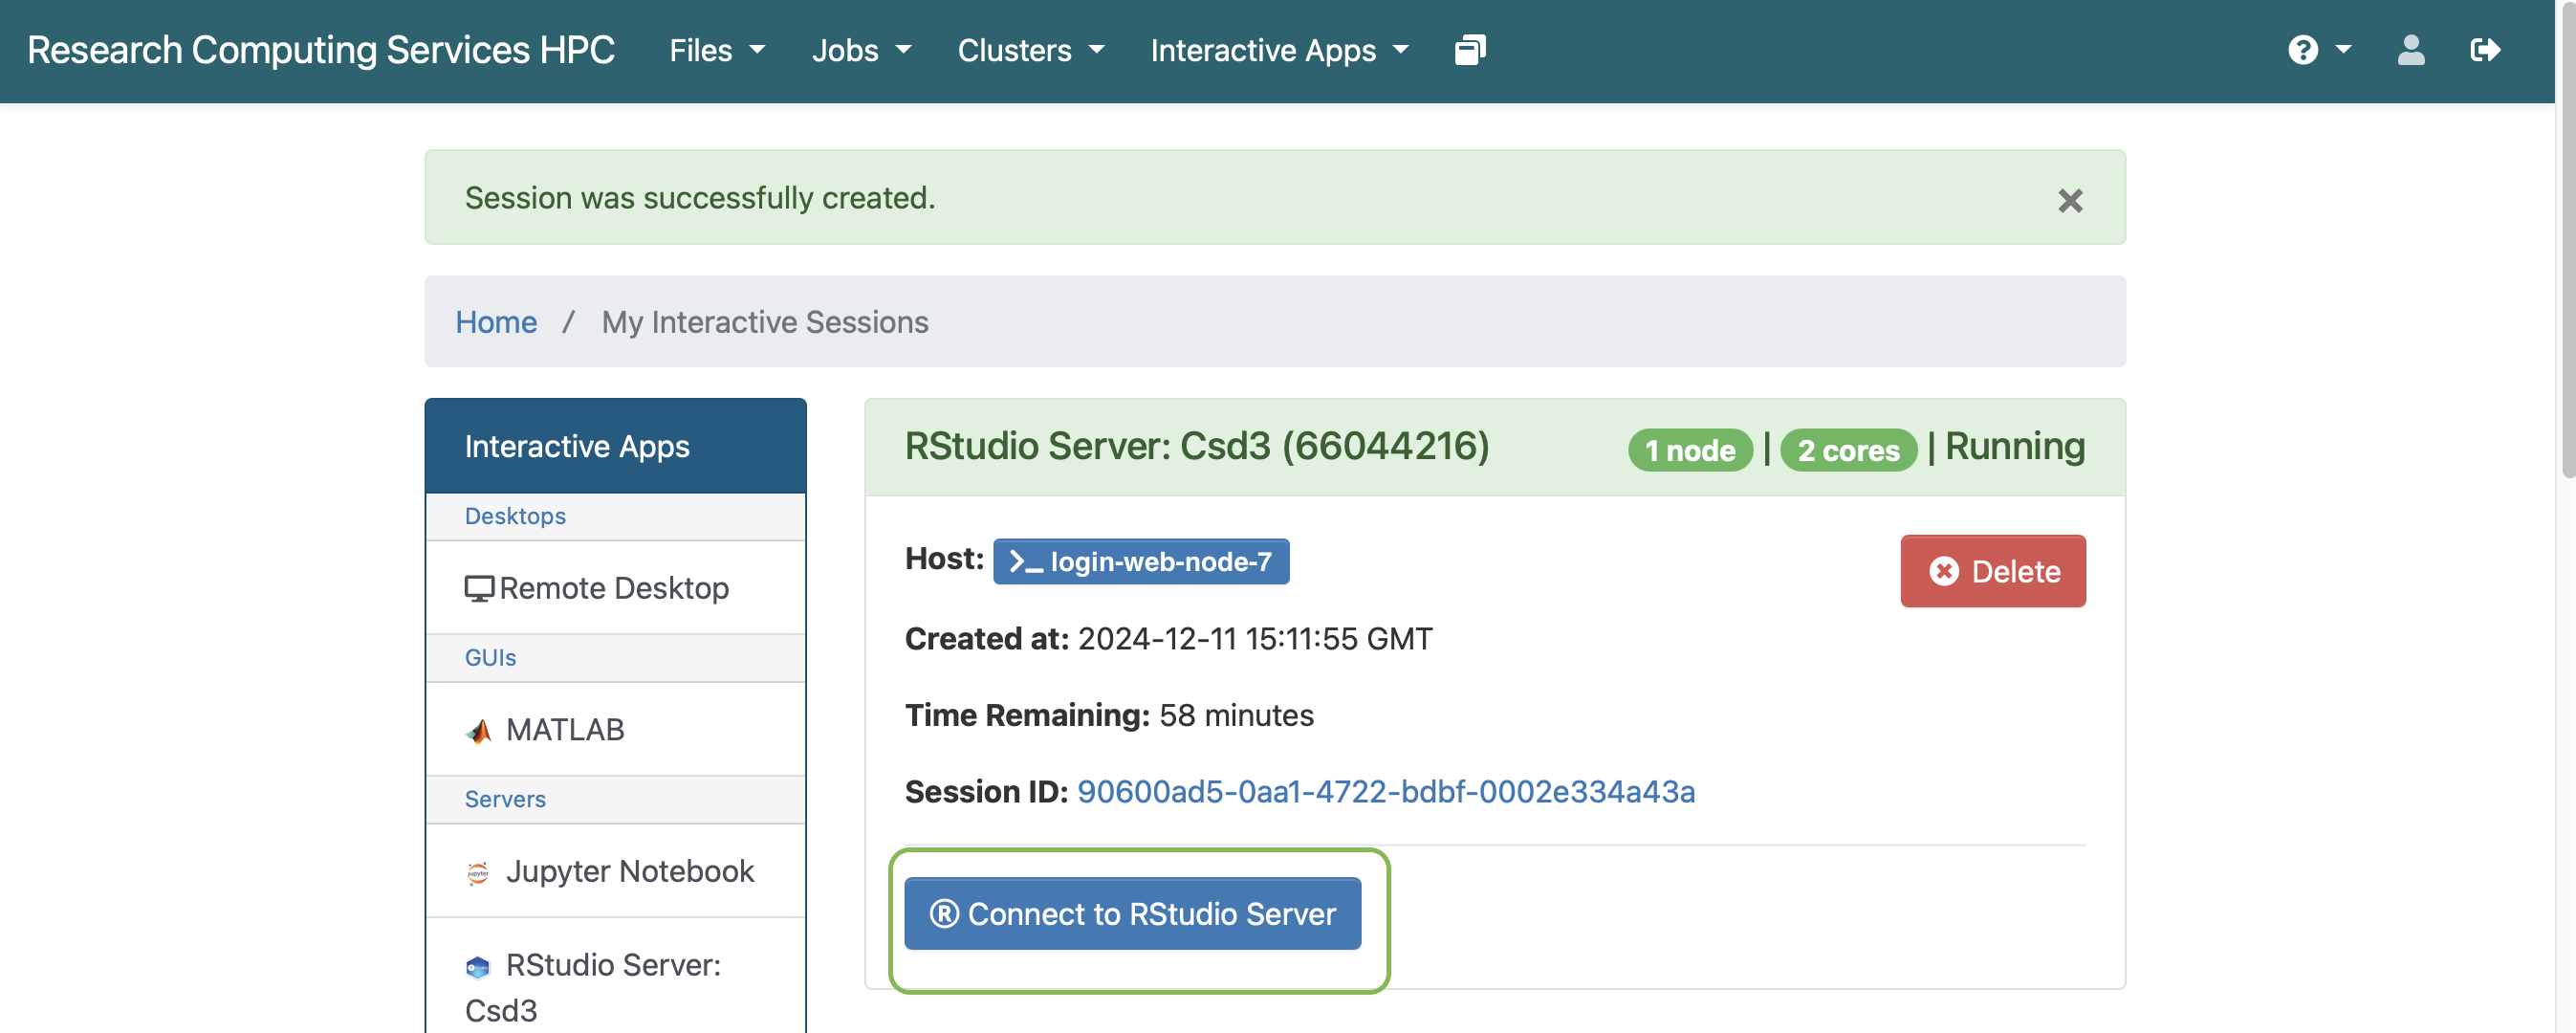
Press the button Connect to RStudio Server. This will open the RStudio IDE in a new browser tab, which should look like this:
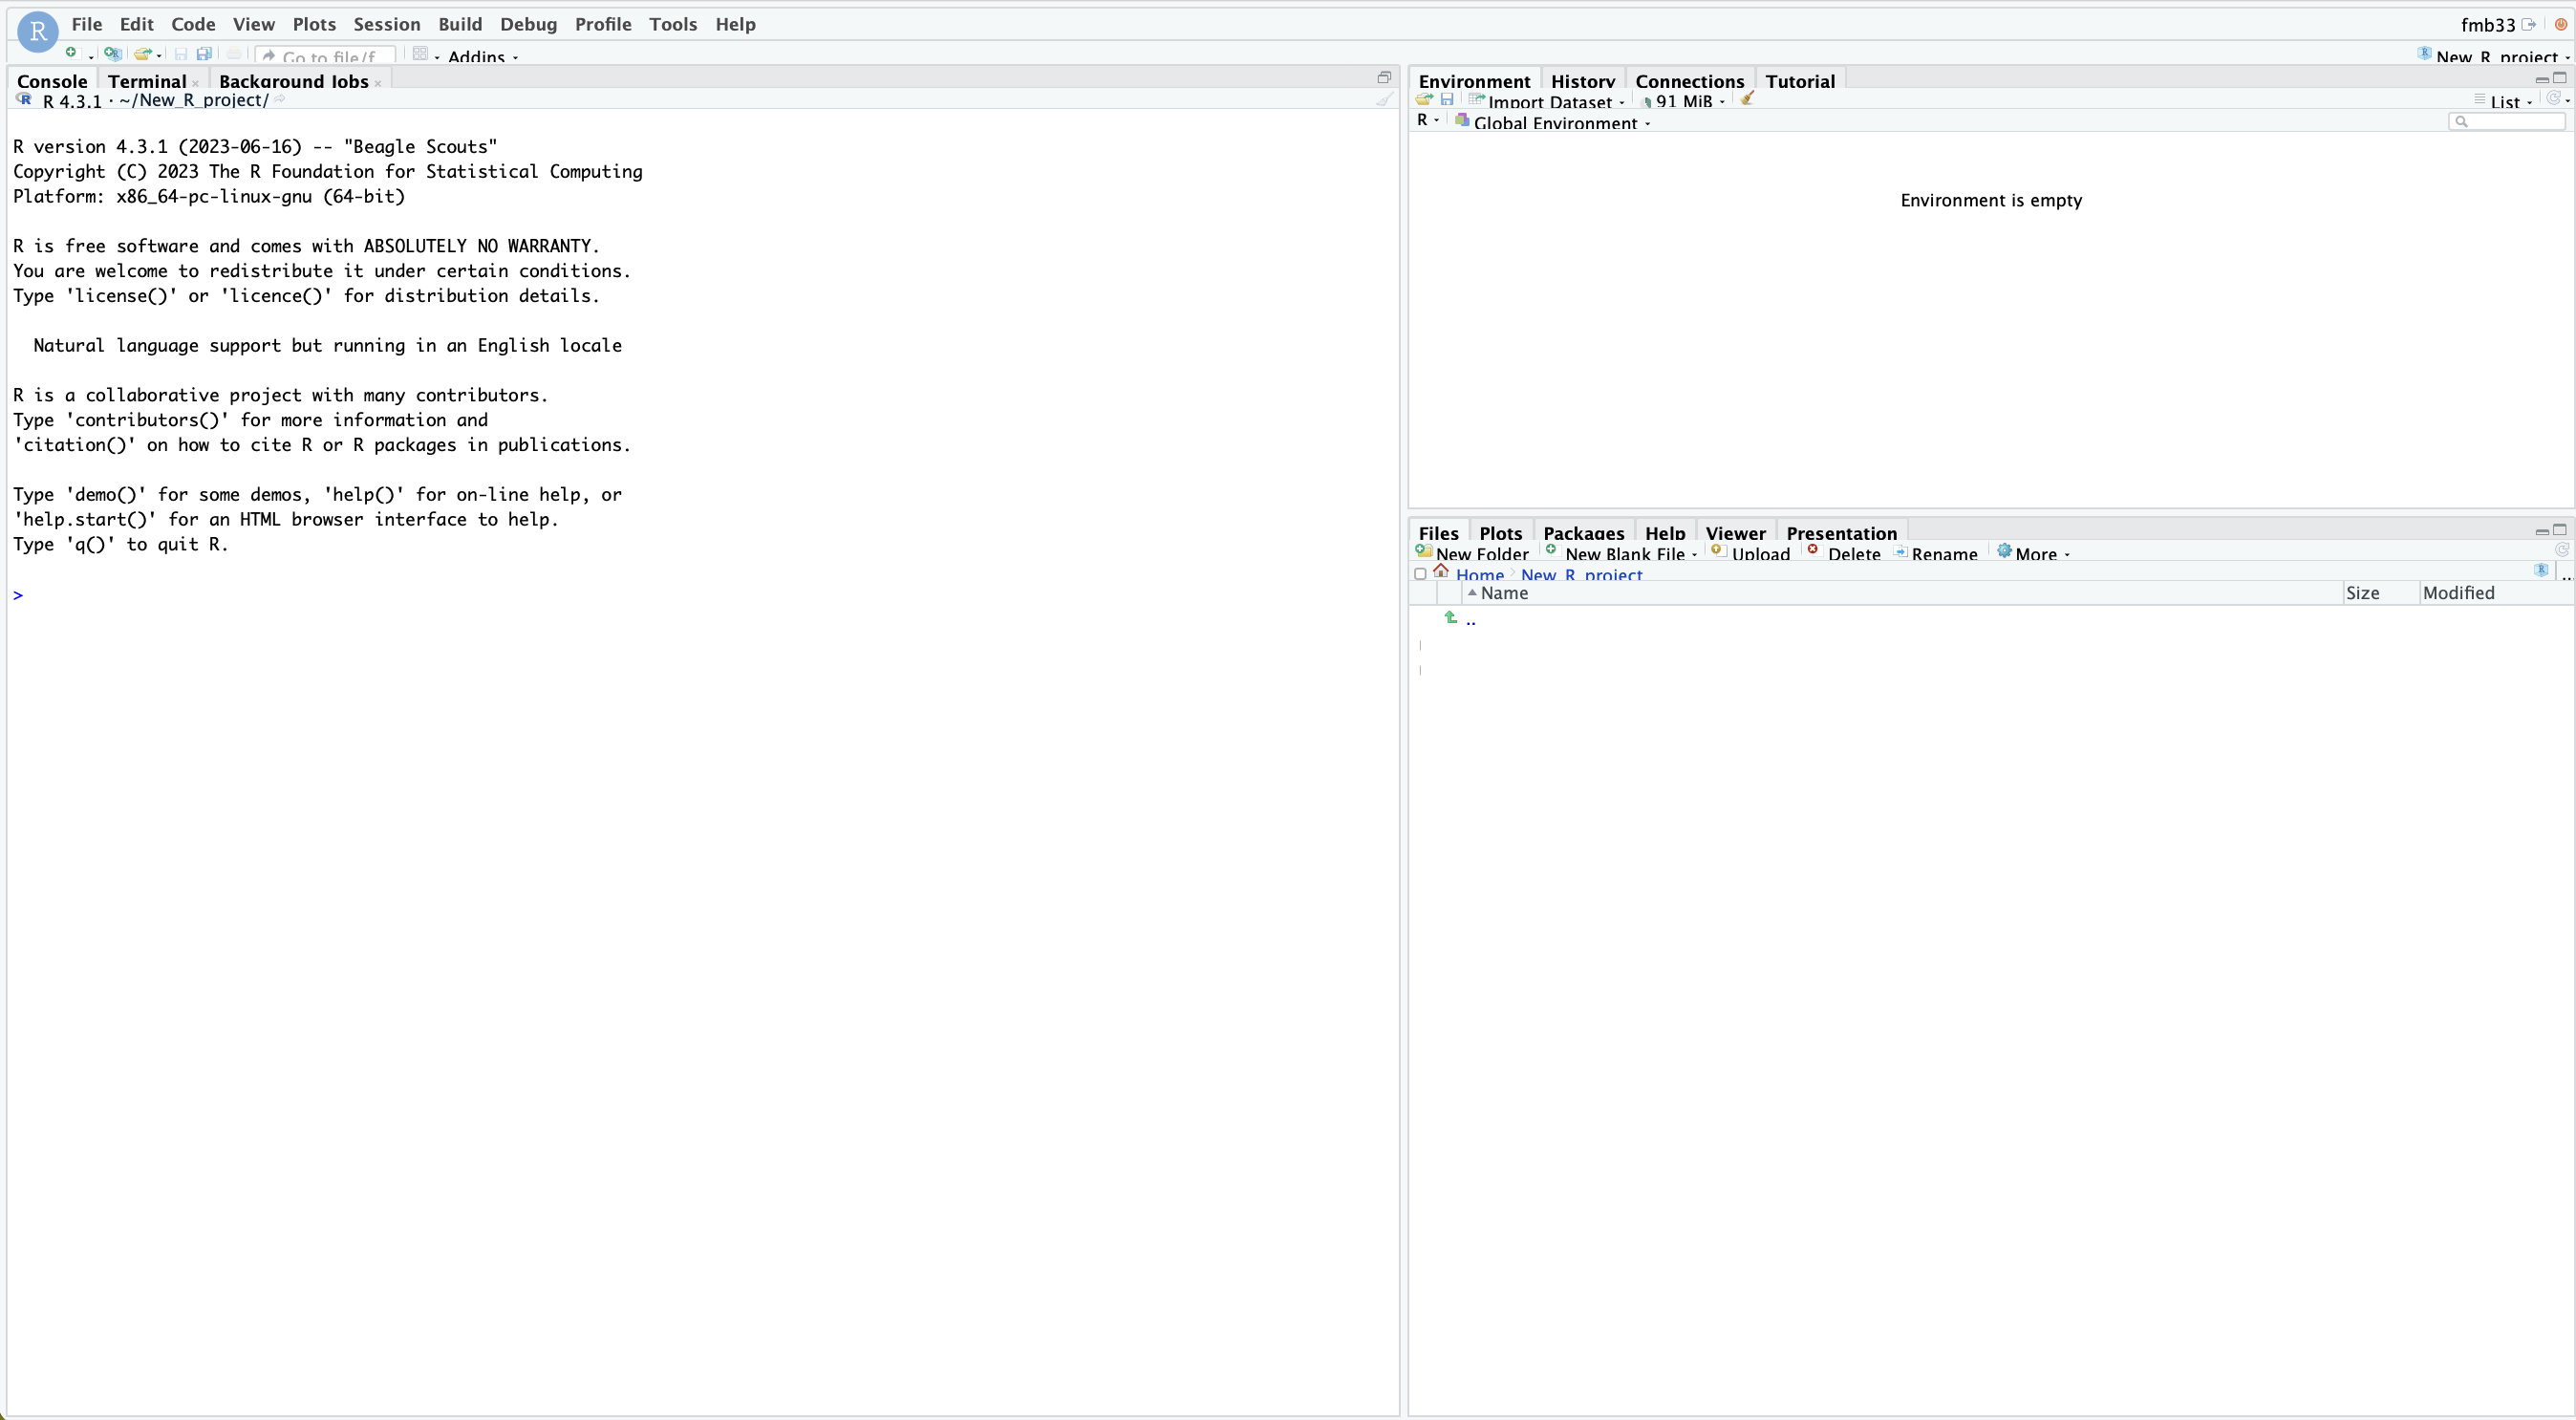
The IDE is made of panels and tabs. From the default tab Console, 3 panels are visible:
- The actual console, to the left, with a prompt to an interactive R session.
- A first management panel, on the top-right corner, to manage Environments, check your session history or the available tutorials.
- A second management panel, on the bottom-right corner, to manage files, plots, packages and look at plots.
Managing user environments and projects on RStudio
RStudio is a complete IDE that allows direct project creation and management.
To create a new project, select File from the top toolbar, then New project.., as shown below:
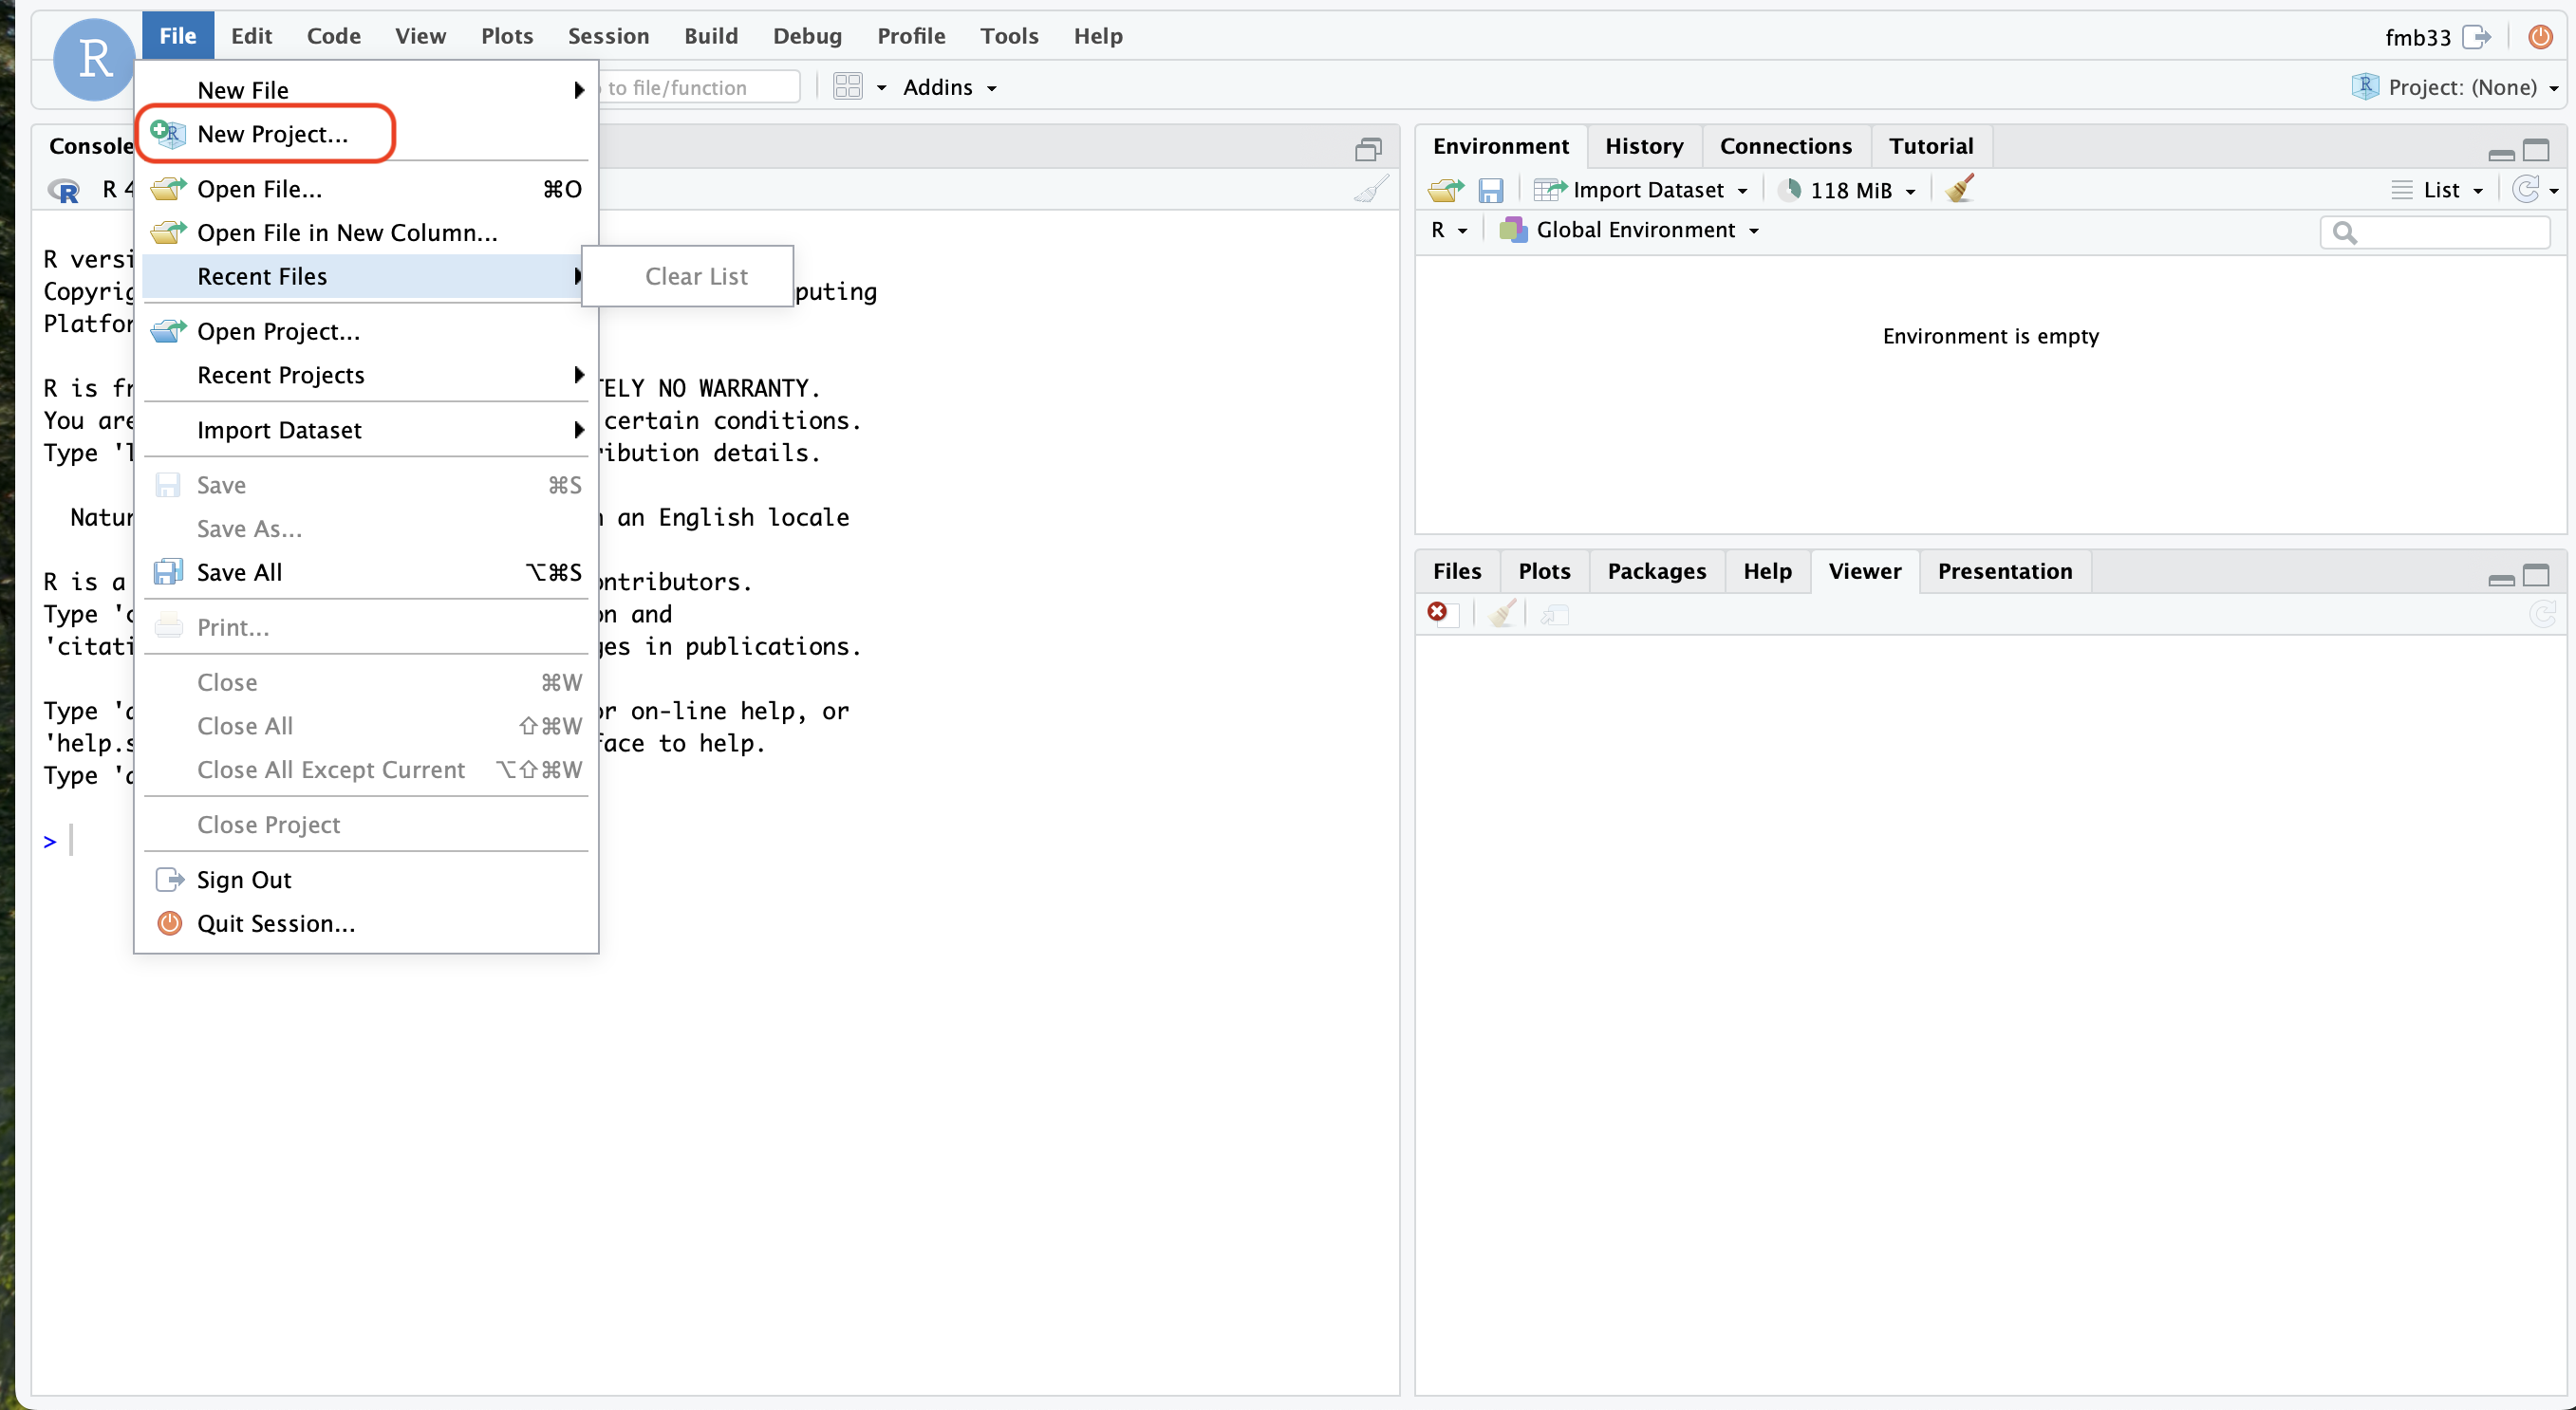
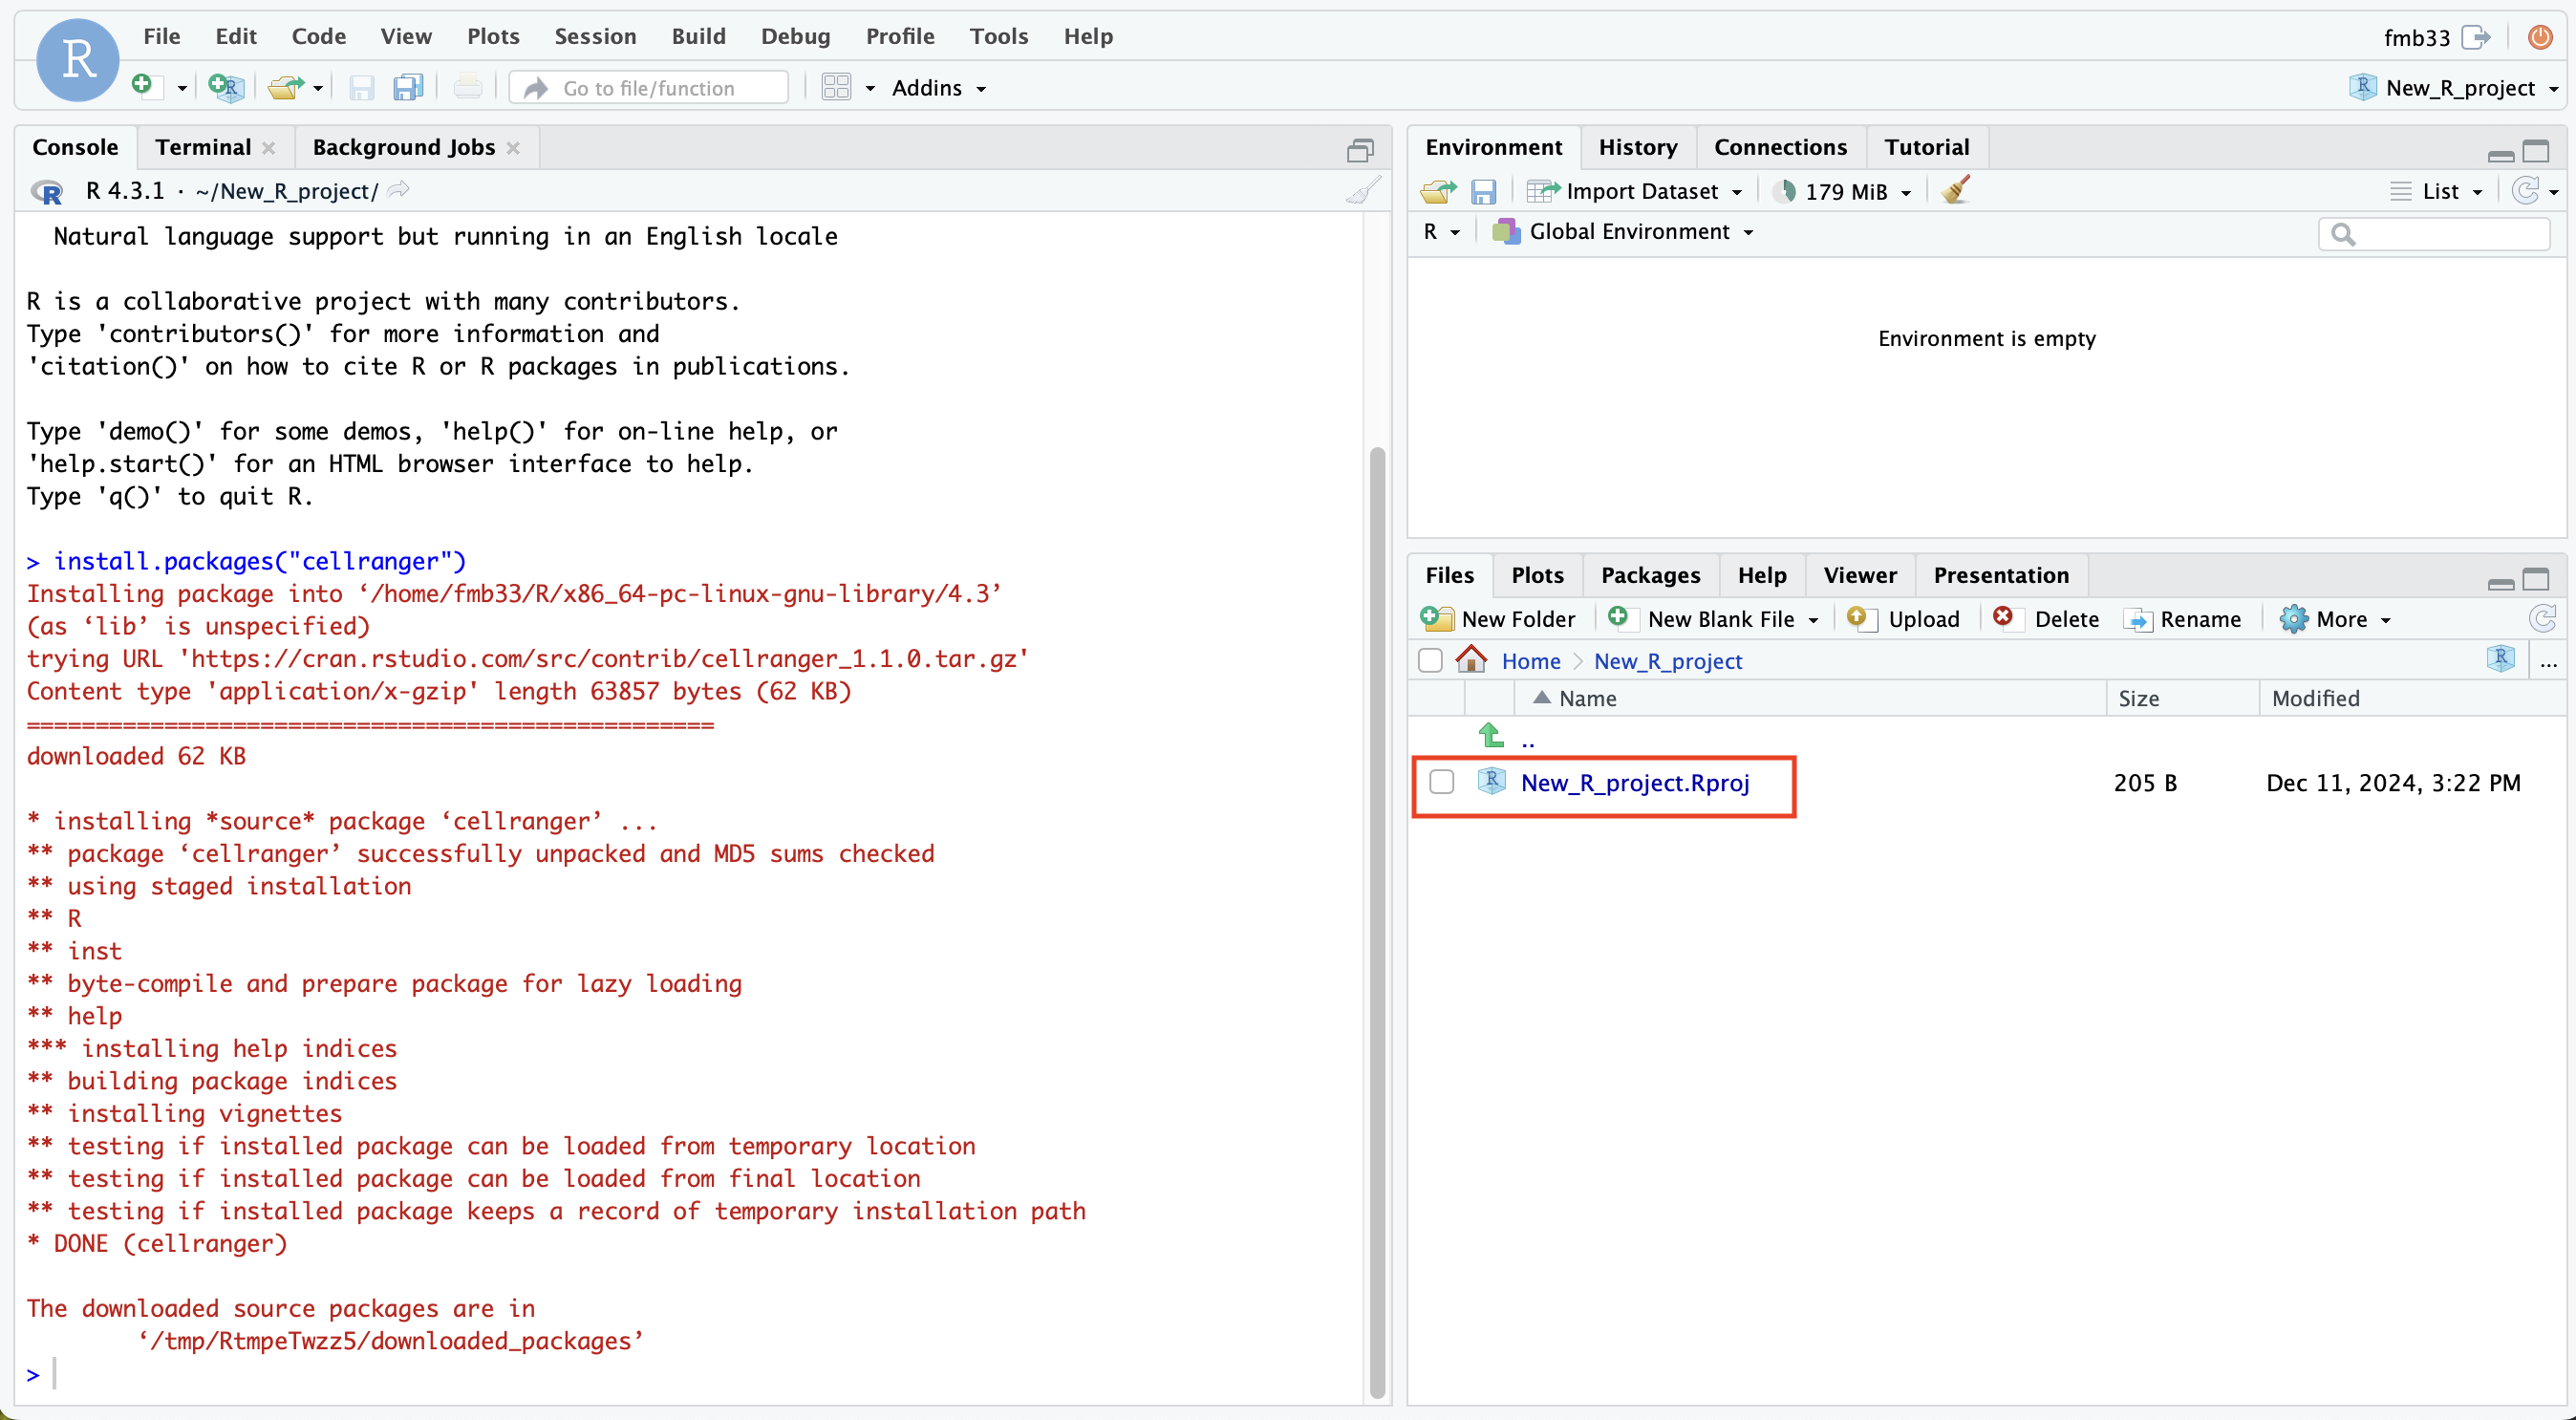
then follows the instructions from the pop-up wizard. It is good practice to create a new folder for each new project. At the end, a setup file ending with .Rproj is created.
Use the console to add new packages to your project, as shown below:
Reference
Login-Web is based on Open OnDemand
This documentation is based on Ohio Supercomputer Center user documentation for their Open OnDemand deployment (OSC OnDemand).
More detail can be found at:
App Developers
If you’d like to develop your own app through OnDemand, see the link below for detailed instructions.
